Pumpkin Patch Hairstyles for Every Hair Length: 20 Cute & Easy Ideas
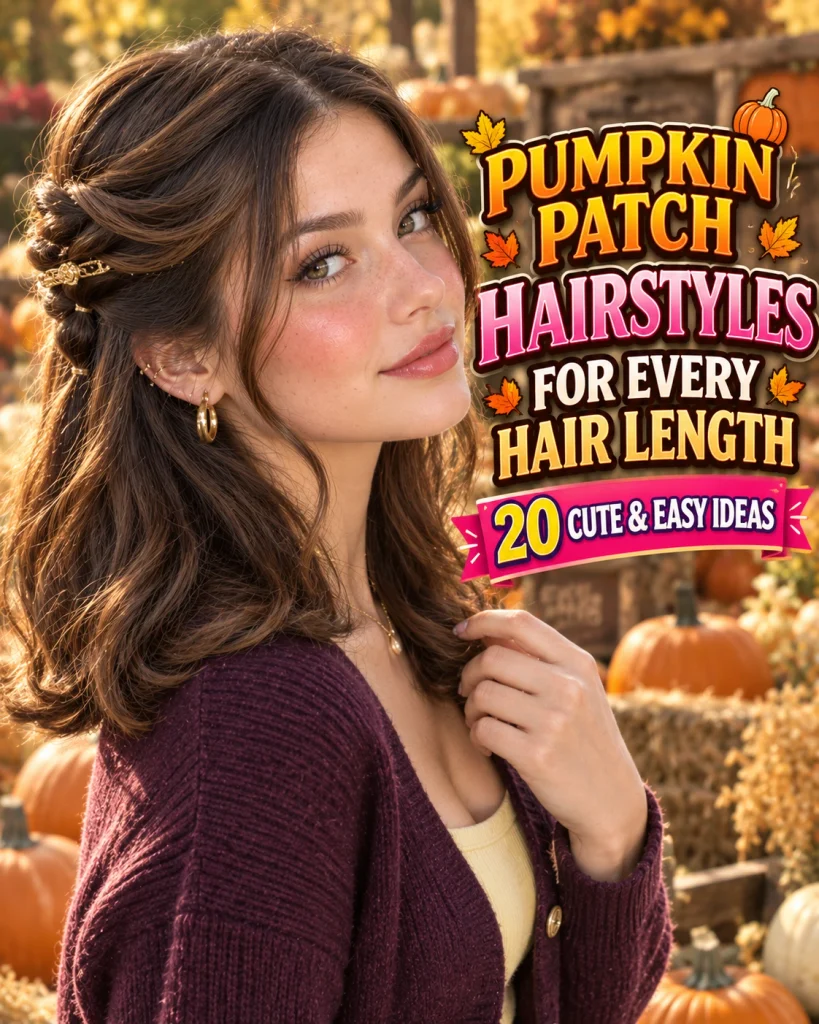
Pumpkin patch hairstyles for every hair length are the perfect excuse to try a look that feels cute, effortless, and ready for autumn pictures. Whether you have a short bob, shoulder-length hair, long layers, or naturally curly texture, you do not need an elaborate styling routine to create a look that feels special. A few well-placed clips, a simple twist, or a braid that keeps your hair in place can transform your everyday hairstyle into something photo-ready.
The best Easy Pumpkin Patch Hairstyles combine attractive details with practical styling. Outdoor outings often involve walking, changing weather, breezes, and plenty of photos, so your hairstyle should look good without requiring constant touch-ups. Short hair can benefit from decorative clips and mini twists, medium-length hair offers plenty of half-up options, and long hair gives you room to experiment with braids and secure ponytails. Naturally curly hair deserves options that celebrate its texture rather than forcing it into a completely different shape.
This guide includes 20 cute ideas for different hair lengths and textures, from quick styles you can create in minutes to more detailed looks that still feel manageable. Each one can be adapted to your personal aesthetic, whether you prefer a casual outfit, a romantic fall dress, or a cozy everyday look. Choose the hairstyle that works with your length, use accessories thoughtfully, and enjoy a pumpkin patch style that feels as good as it looks. For more cute outdoor looks, see our pumpkin patch hairstyles.
1. Mini Clipped Side Sweep for Short Hair
Short hair can look styled and intentional without needing a ponytail or braid. Create a soft side part, then sweep the smaller front section away from your face and secure it with two small clips placed close together. You can choose tortoiseshell clips for a subtle finish, tiny flower clips for a playful look, or simple metallic pins for a cleaner aesthetic. Leave the rest of your bob or pixie-bob in its natural shape, adding a little texture to the ends if desired.
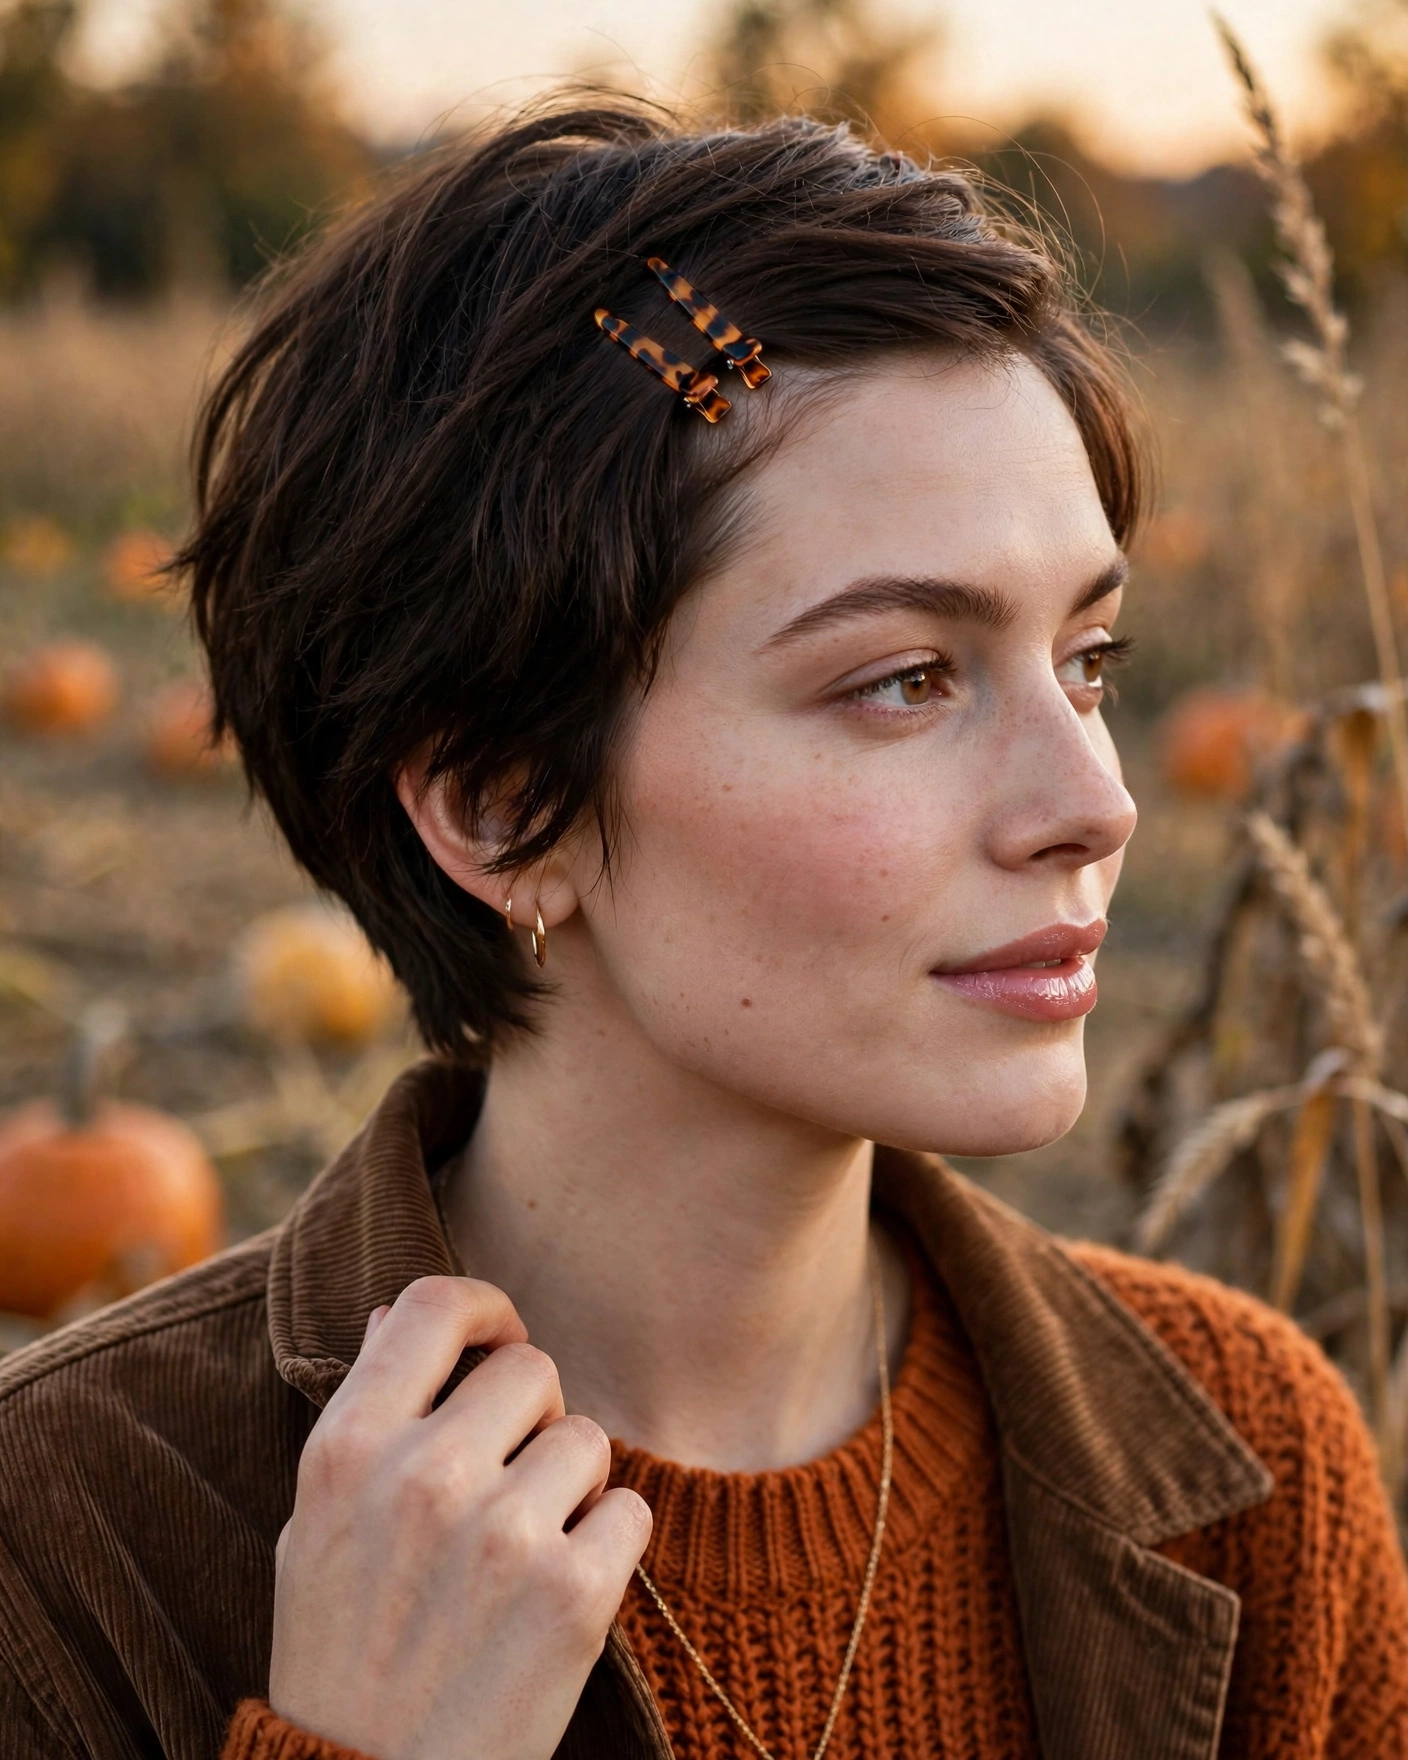
This hairstyle is especially useful when you want a quick change before heading out. The clips keep one side away from your eyes while allowing the haircut itself to remain visible in photographs. For a pumpkin patch setting, try warm-toned accessories that complement your outfit without matching every detail. If your hair is very fine, choose lightweight clips that will not slide down. A small amount of texturizing cream can help the front section stay in place, but keep the roots soft so the hairstyle does not look stiff or overly slick.
2. Half-Up Mini Twist for Medium Hair
A half-up mini twist is ideal for medium-length hair because it creates a visible hairstyle without taking away too much length. Take two small sections from above your ears and twist each one backward. Bring them together at the back of your head and secure them with a small elastic or a flat clip. Keep the twists close to the head so they stay comfortable, and let the remaining hair fall freely over your shoulders.
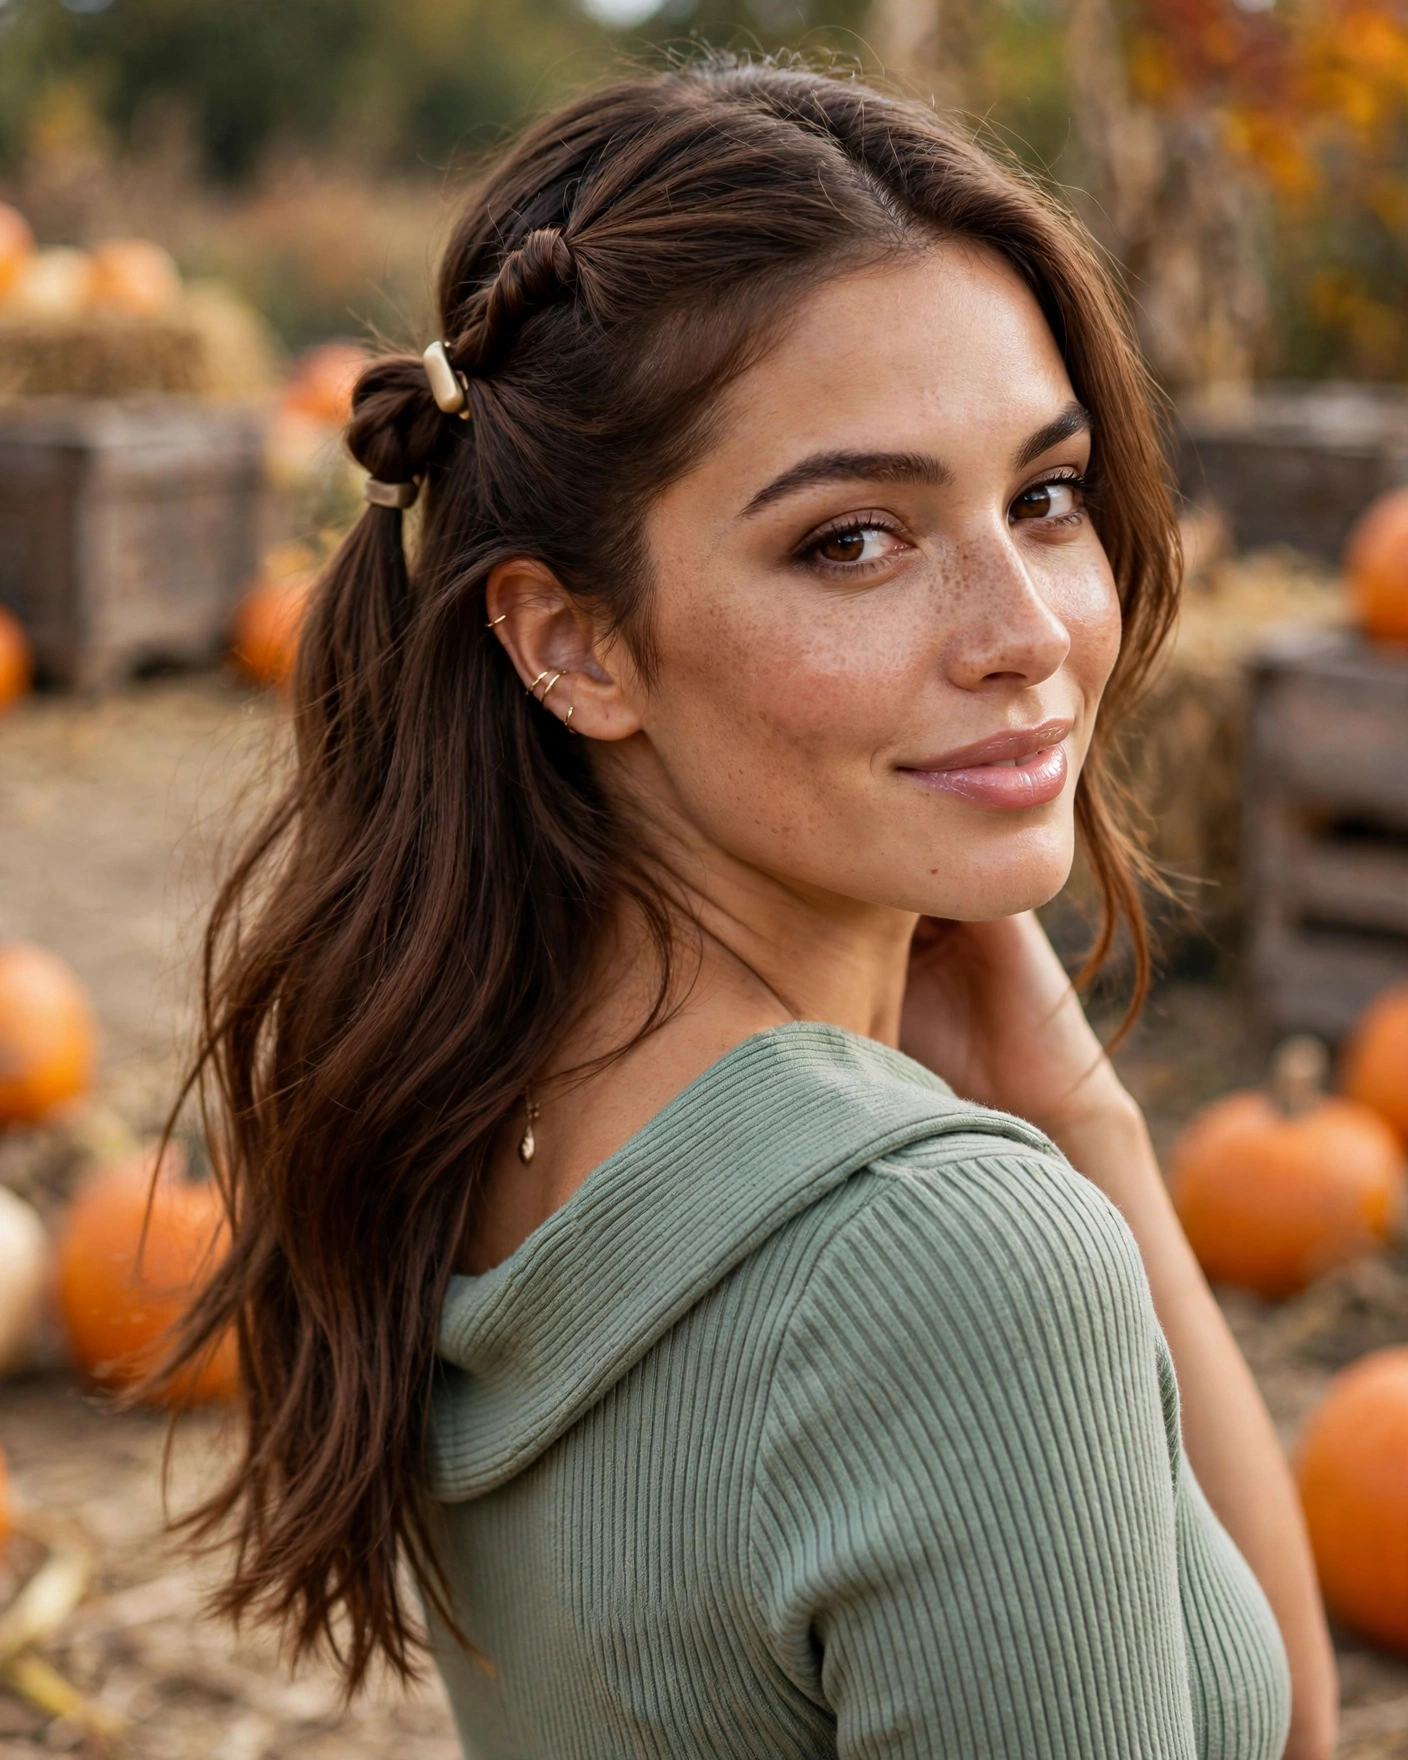
The style works with straight, wavy, and lightly layered hair. You can leave the ends natural or add a gentle bend for extra movement. A tiny bow or a simple decorative clip can finish the look, but the twist should remain the main feature. Because the gathered section is compact, it is less likely to interfere with a jacket collar or become uncomfortable while walking outdoors. For photos, turn slightly to show the twist from the side and back. If shorter layers slip free, use a discreet pin rather than pulling the entire style tighter.
3. Long Low Braided Ponytail
A low braided ponytail is a reliable choice for long hair when you want a neat hairstyle that stays manageable outdoors. Gather your hair at the nape of your neck and secure it with a soft elastic. Braid the ponytail into a traditional three-strand braid, then fasten the end with a small band. Keep the braid relaxed rather than extremely tight so it has a fuller, softer appearance. If your hair is layered, gently smooth shorter pieces around the base before braiding.
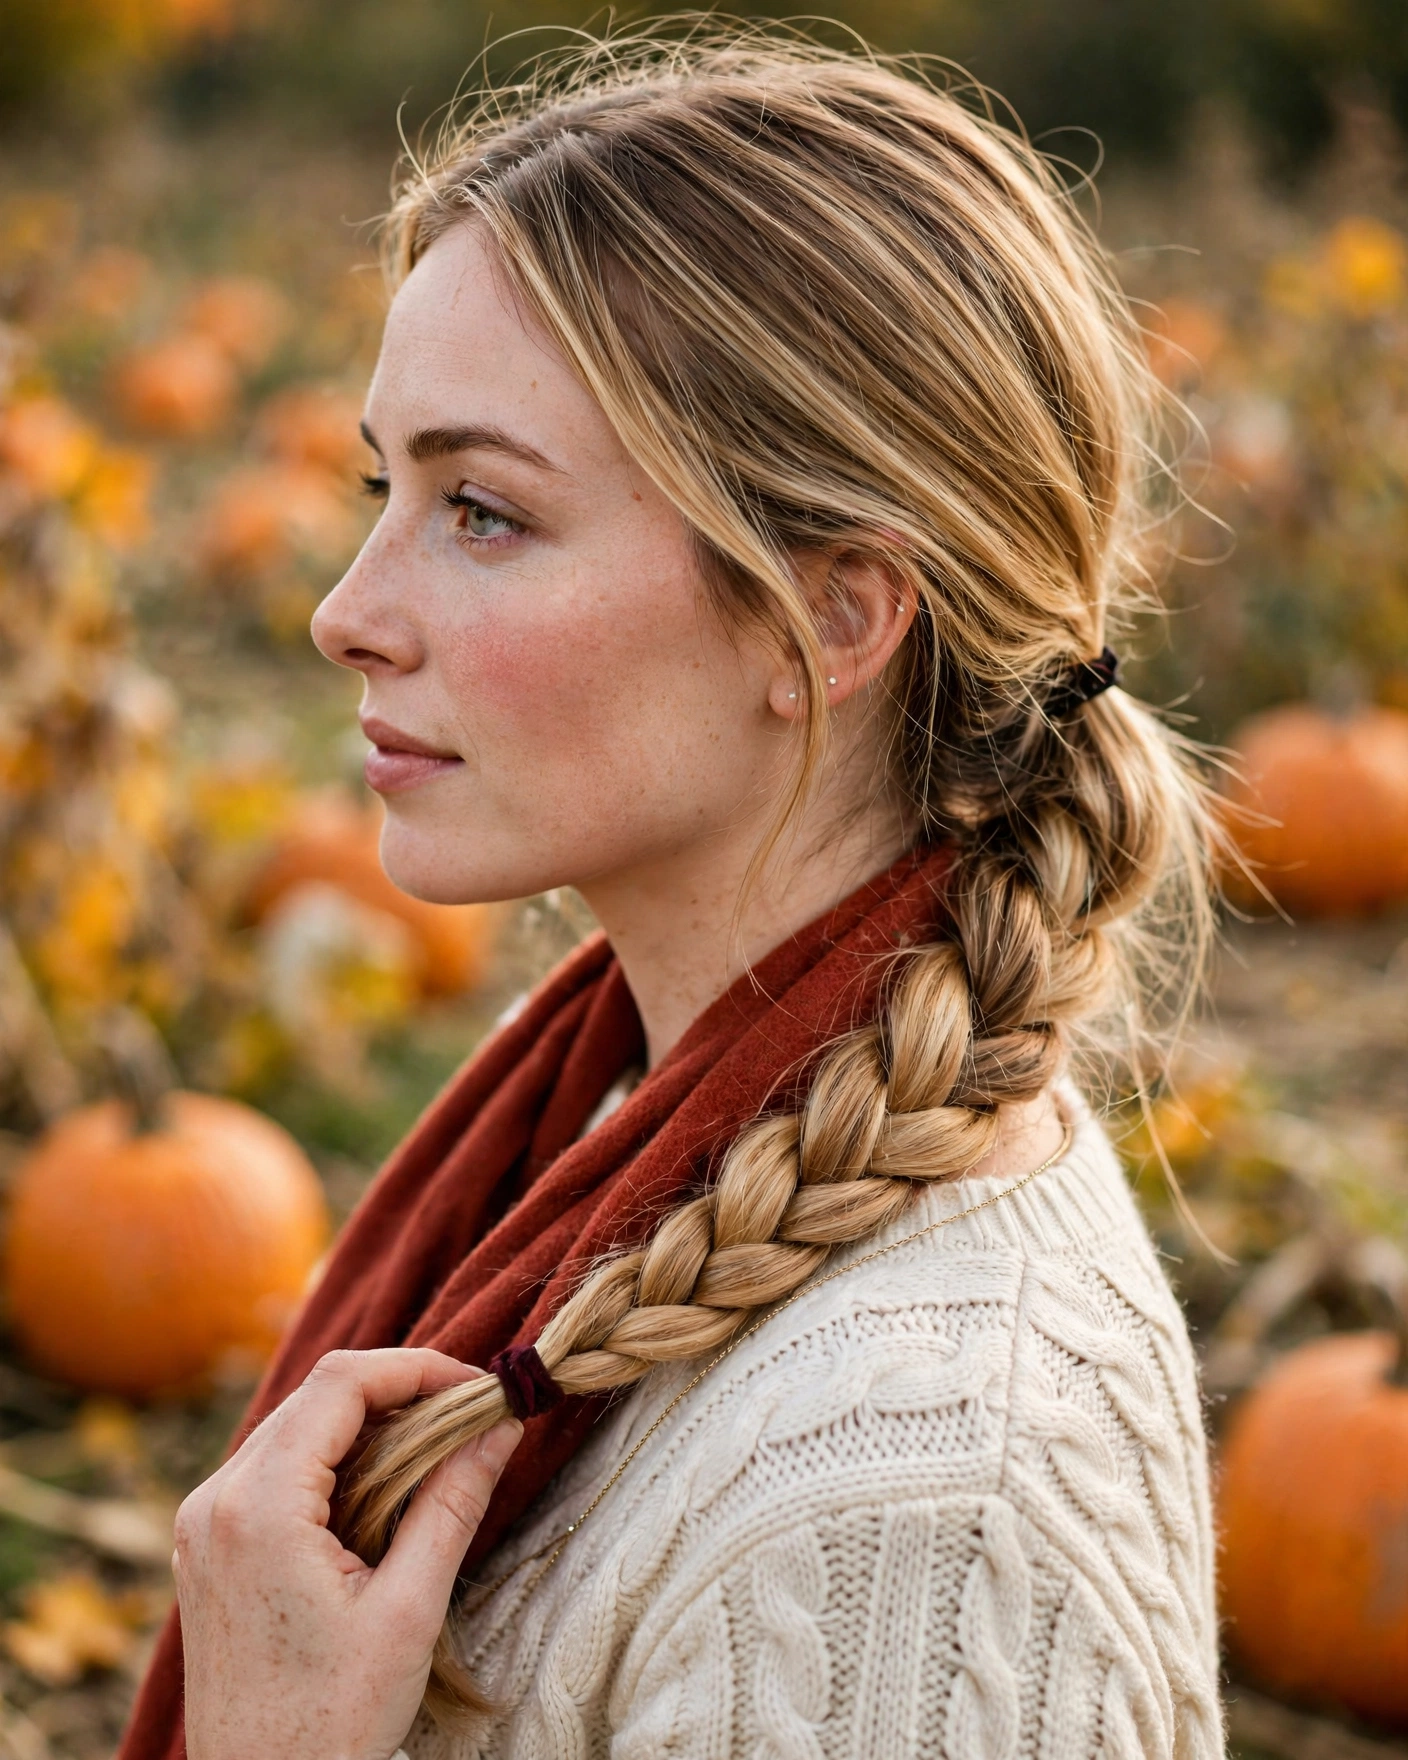
The low placement helps reduce tangling and keeps the hairstyle comfortable under scarves or high collars. It also gives you a clear silhouette in back-facing photographs, especially when the braid falls over one shoulder. You can leave the style plain for an easy everyday finish or add a narrow ribbon near the end for a small autumn detail. A lightweight leave-in product can help manage flyaways, particularly if the weather is breezy. Avoid heavy products near the roots, as they may make the hair look flat by the end of your outing.
4. Natural Curly Half-Up Puff
A natural curly half-up puff celebrates curl texture while keeping some hair away from the face. Separate the upper section of your hair and gently gather it toward the crown or upper back of your head. Secure it with a soft scrunchie or a suitable hair tie, allowing the curls to form a rounded puff. Keep the lower curls loose so the style retains volume and movement. Use your usual curl cream or leave-in product if needed, rather than brushing the curls into a different texture.
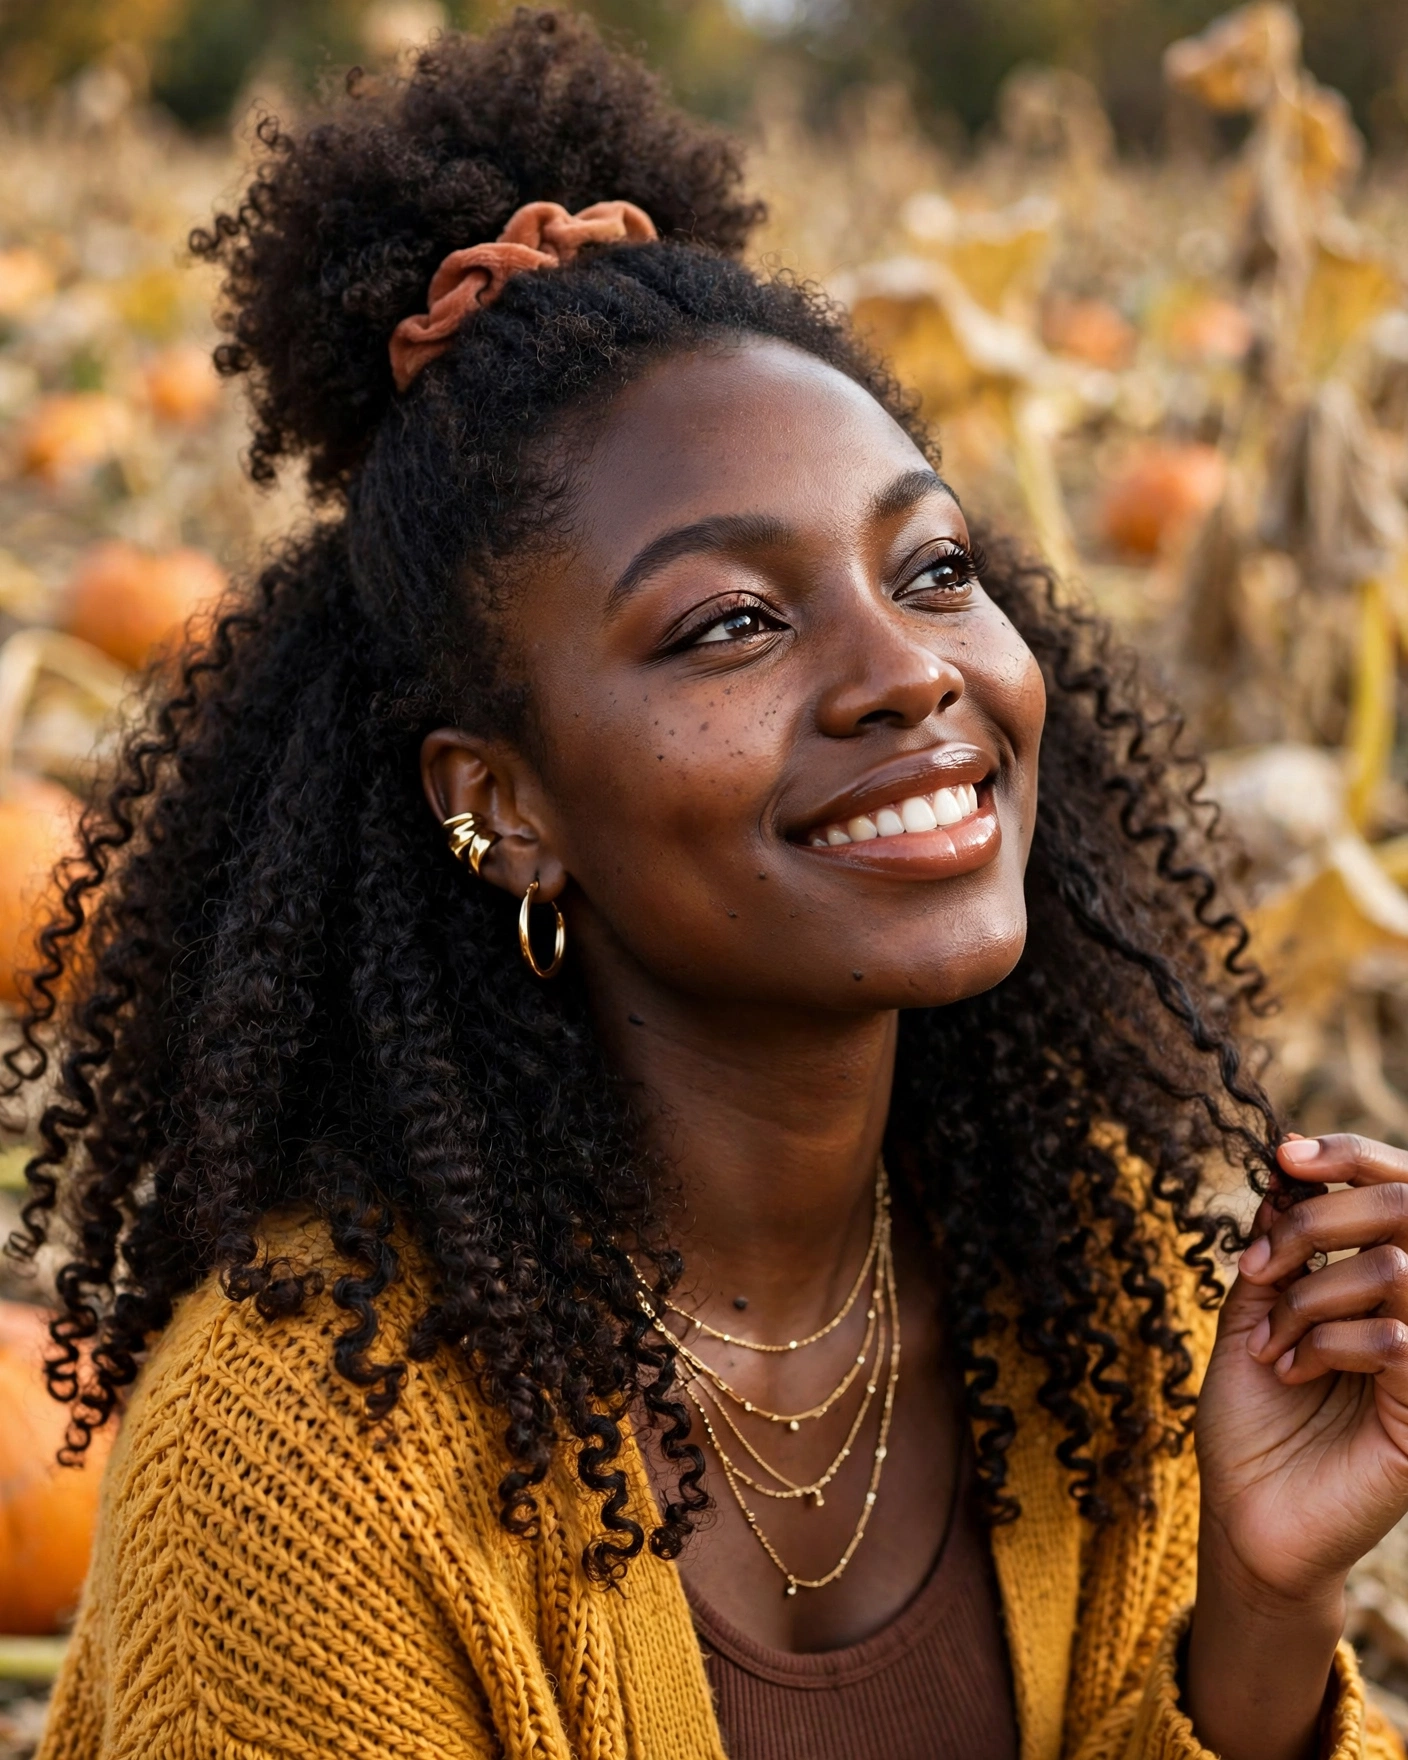
This hairstyle works especially well when you want a cute look without spending extra time defining every curl individually. The gathered section gives the style shape, while the loose curls frame the face and create a lovely silhouette in pictures. Choose a scrunchie that complements your outfit, or leave the tie hidden for a more natural finish. To help the style last, start with hair that is fully dry and avoid repeatedly adjusting the puff throughout the day. When taking photos, position your head at a slight angle to show both the gathered curls and the natural volume at the back.
5. Two Tiny Front Braids for Short-to-Medium Hair
Two tiny front braids add definition to short or medium hair without requiring enough length for a full braid. Create a center part and select a narrow section from each side near the temples. Braid each section a short distance down, then secure the ends with miniature elastics. Leave the remaining hair loose in its natural texture. If your haircut has layers, keep the braids small and secure them carefully so the shorter ends do not slip out immediately.
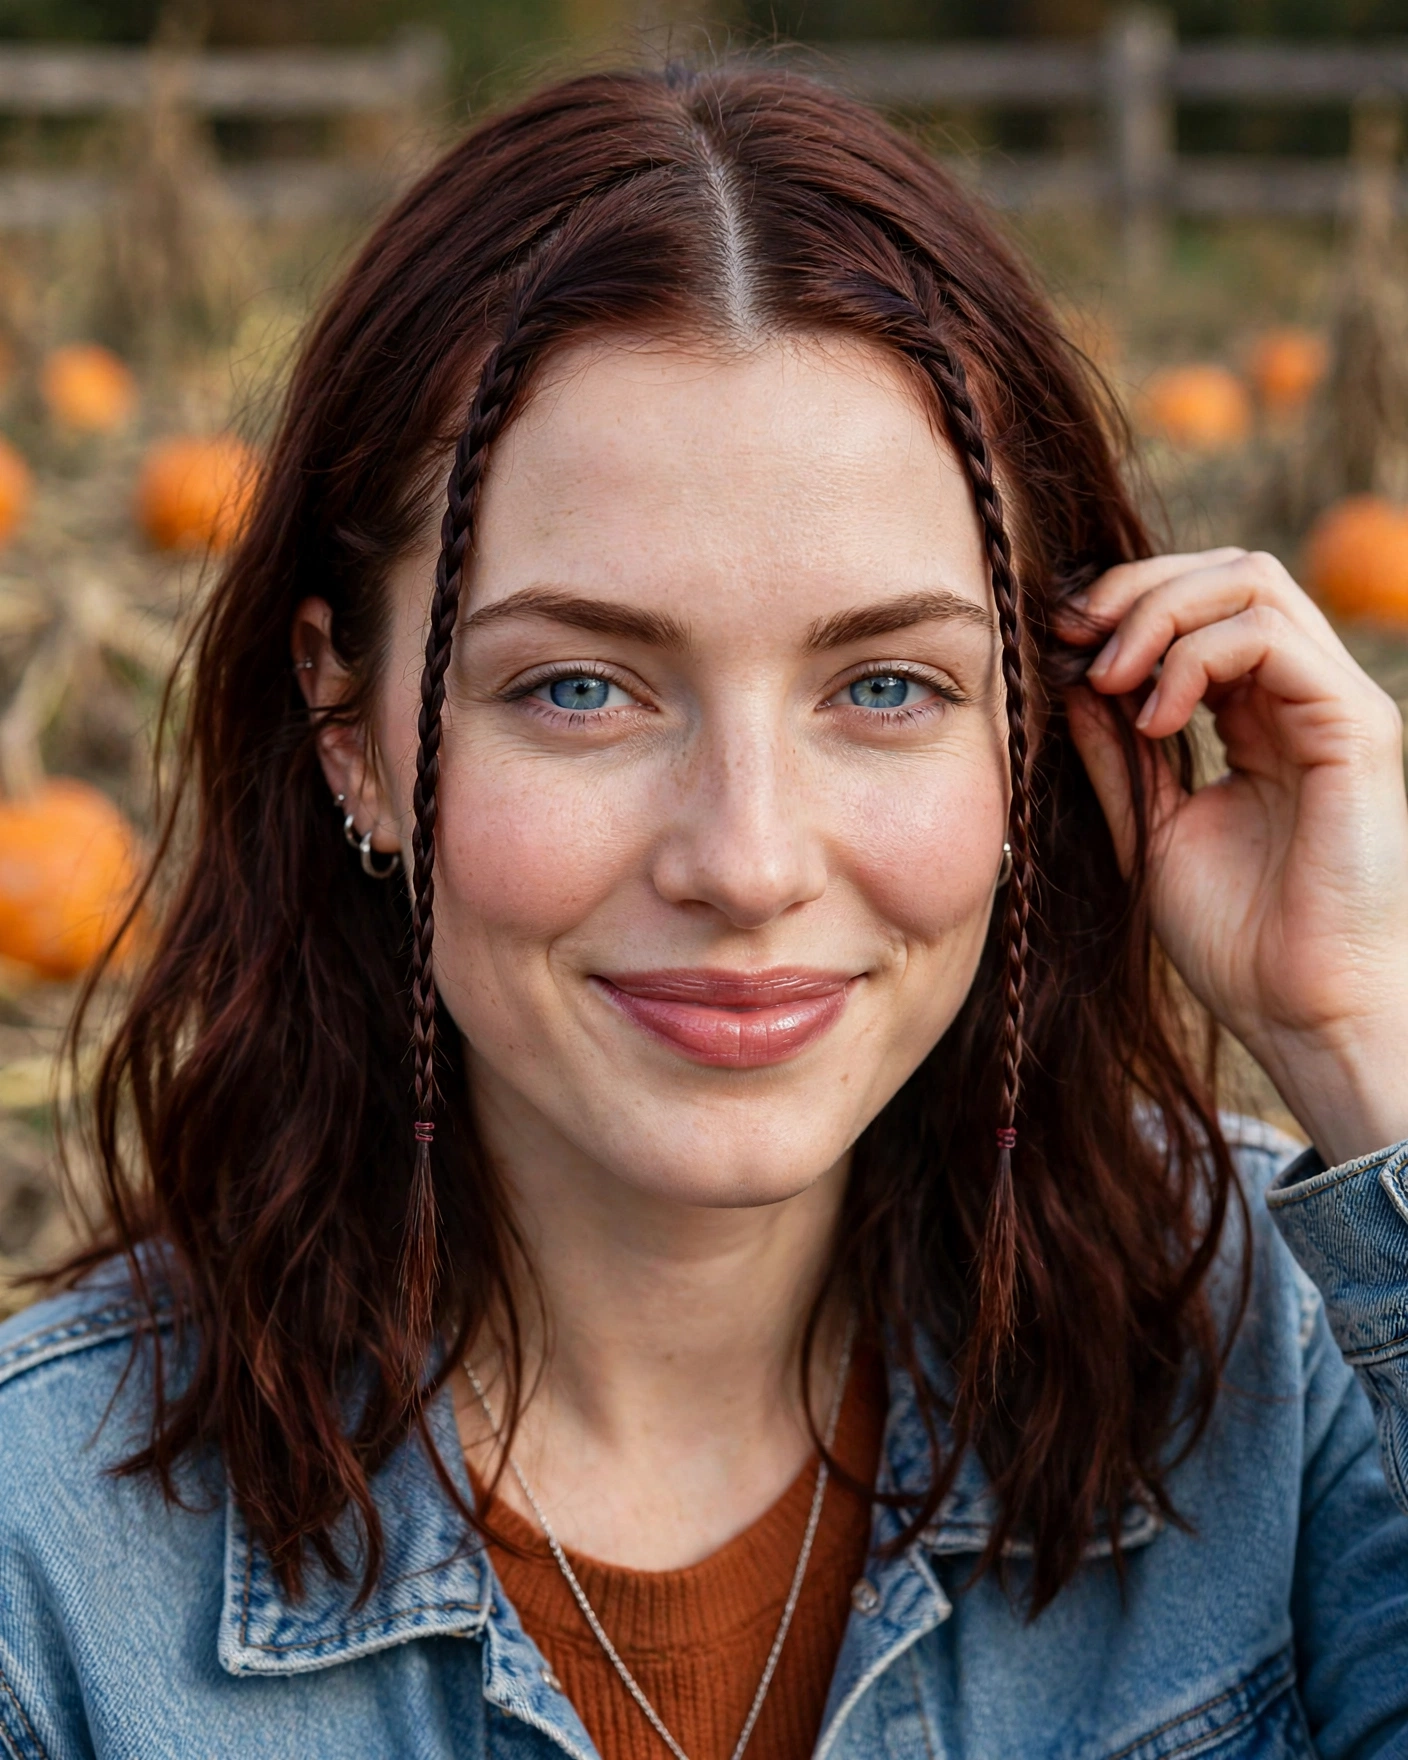
This look is a simple way to make everyday hair feel more playful for autumn photos. The tiny braids remain visible from the front, while the rest of the hairstyle stays easy to maintain. You can add small colored elastics or leave the ends plain for a more understated finish. It is particularly suitable for shoulder-length hair that is too short for substantial ponytails but long enough to create small decorative sections. For windy conditions, a light styling cream can help the braids hold their shape. Keep the braids comfortable around the hairline and avoid pulling them so tightly that they create tension.
6. Low Twisted Bun for Medium-Length Hair
A low twisted bun is a practical option when you want your medium-length hair secured without creating a large, bulky updo. Gather your hair at the nape and twist it loosely until it begins to coil. Fold the ends inward and secure the shape with pins or a small elastic. If your hair is layered, allow a few soft pieces to remain around the face rather than forcing every strand into the bun. The finished shape should sit close to the head and feel comfortable while you move.
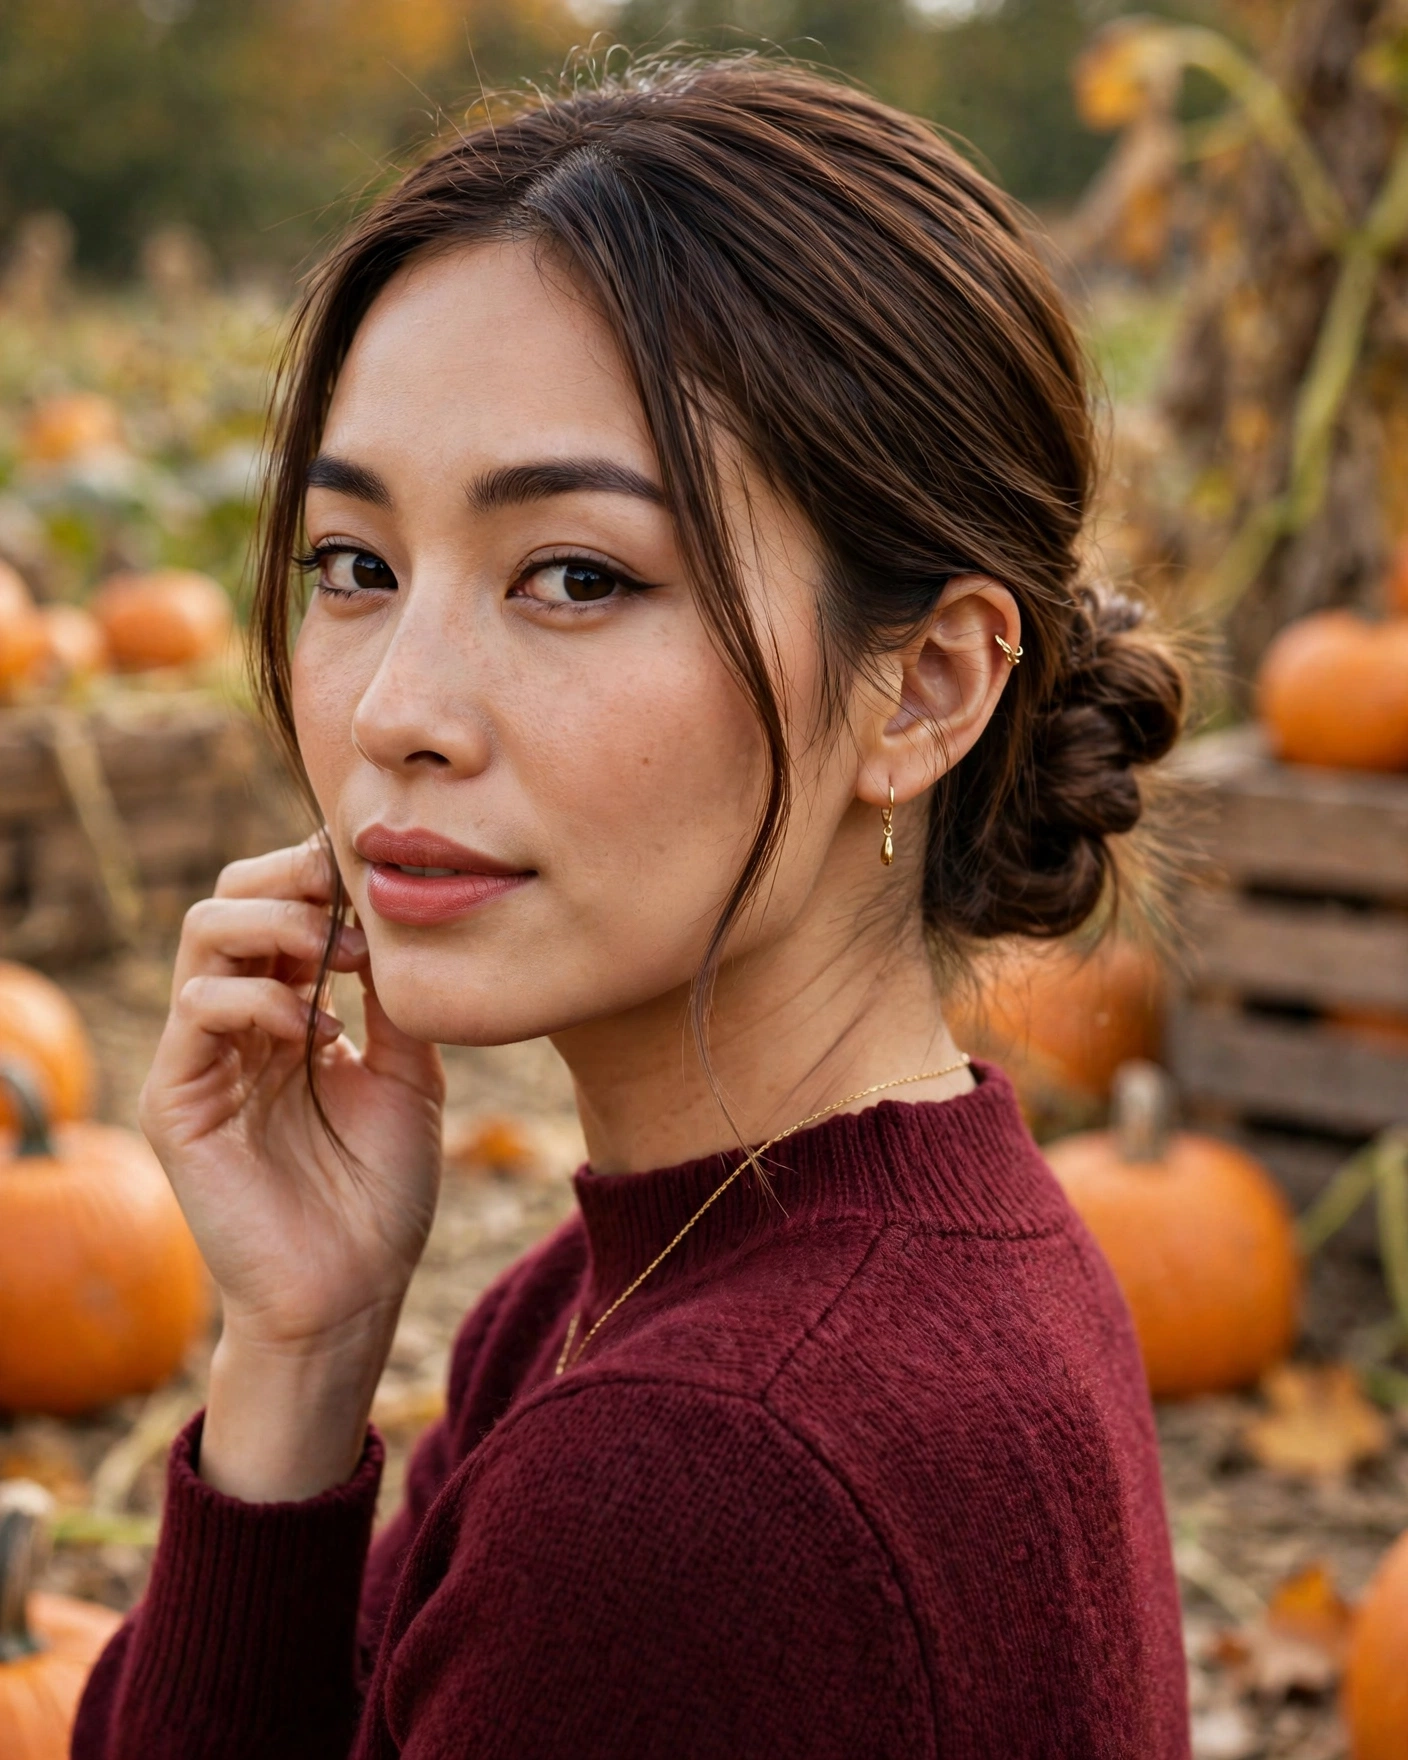
This hairstyle is particularly useful for breezy pumpkin patch visits because the lengths are gathered rather than left loose to tangle. A small claw clip can also secure the twist if it comfortably holds your hair, although pins may be more discreet. Keep the bun slightly relaxed for a casual finish, and choose a decorative pin only if you want an extra detail. The style works with straight and wavy hair, while naturally curly hair can form a textured version with less smoothing. A quick check in the mirror before taking pictures is usually enough to keep the shape looking neat.
7. Long Hair with a Rope-Twist Side Ponytail
A rope-twist side ponytail offers a different texture from a regular ponytail while remaining easy to create. Sweep your long hair over one shoulder and secure it loosely with an elastic. Divide the ponytail into two sections, twist each section in the same direction, then wrap them around each other in the opposite direction. Secure the end with another elastic and gently adjust the twist so it looks defined without becoming too tight.
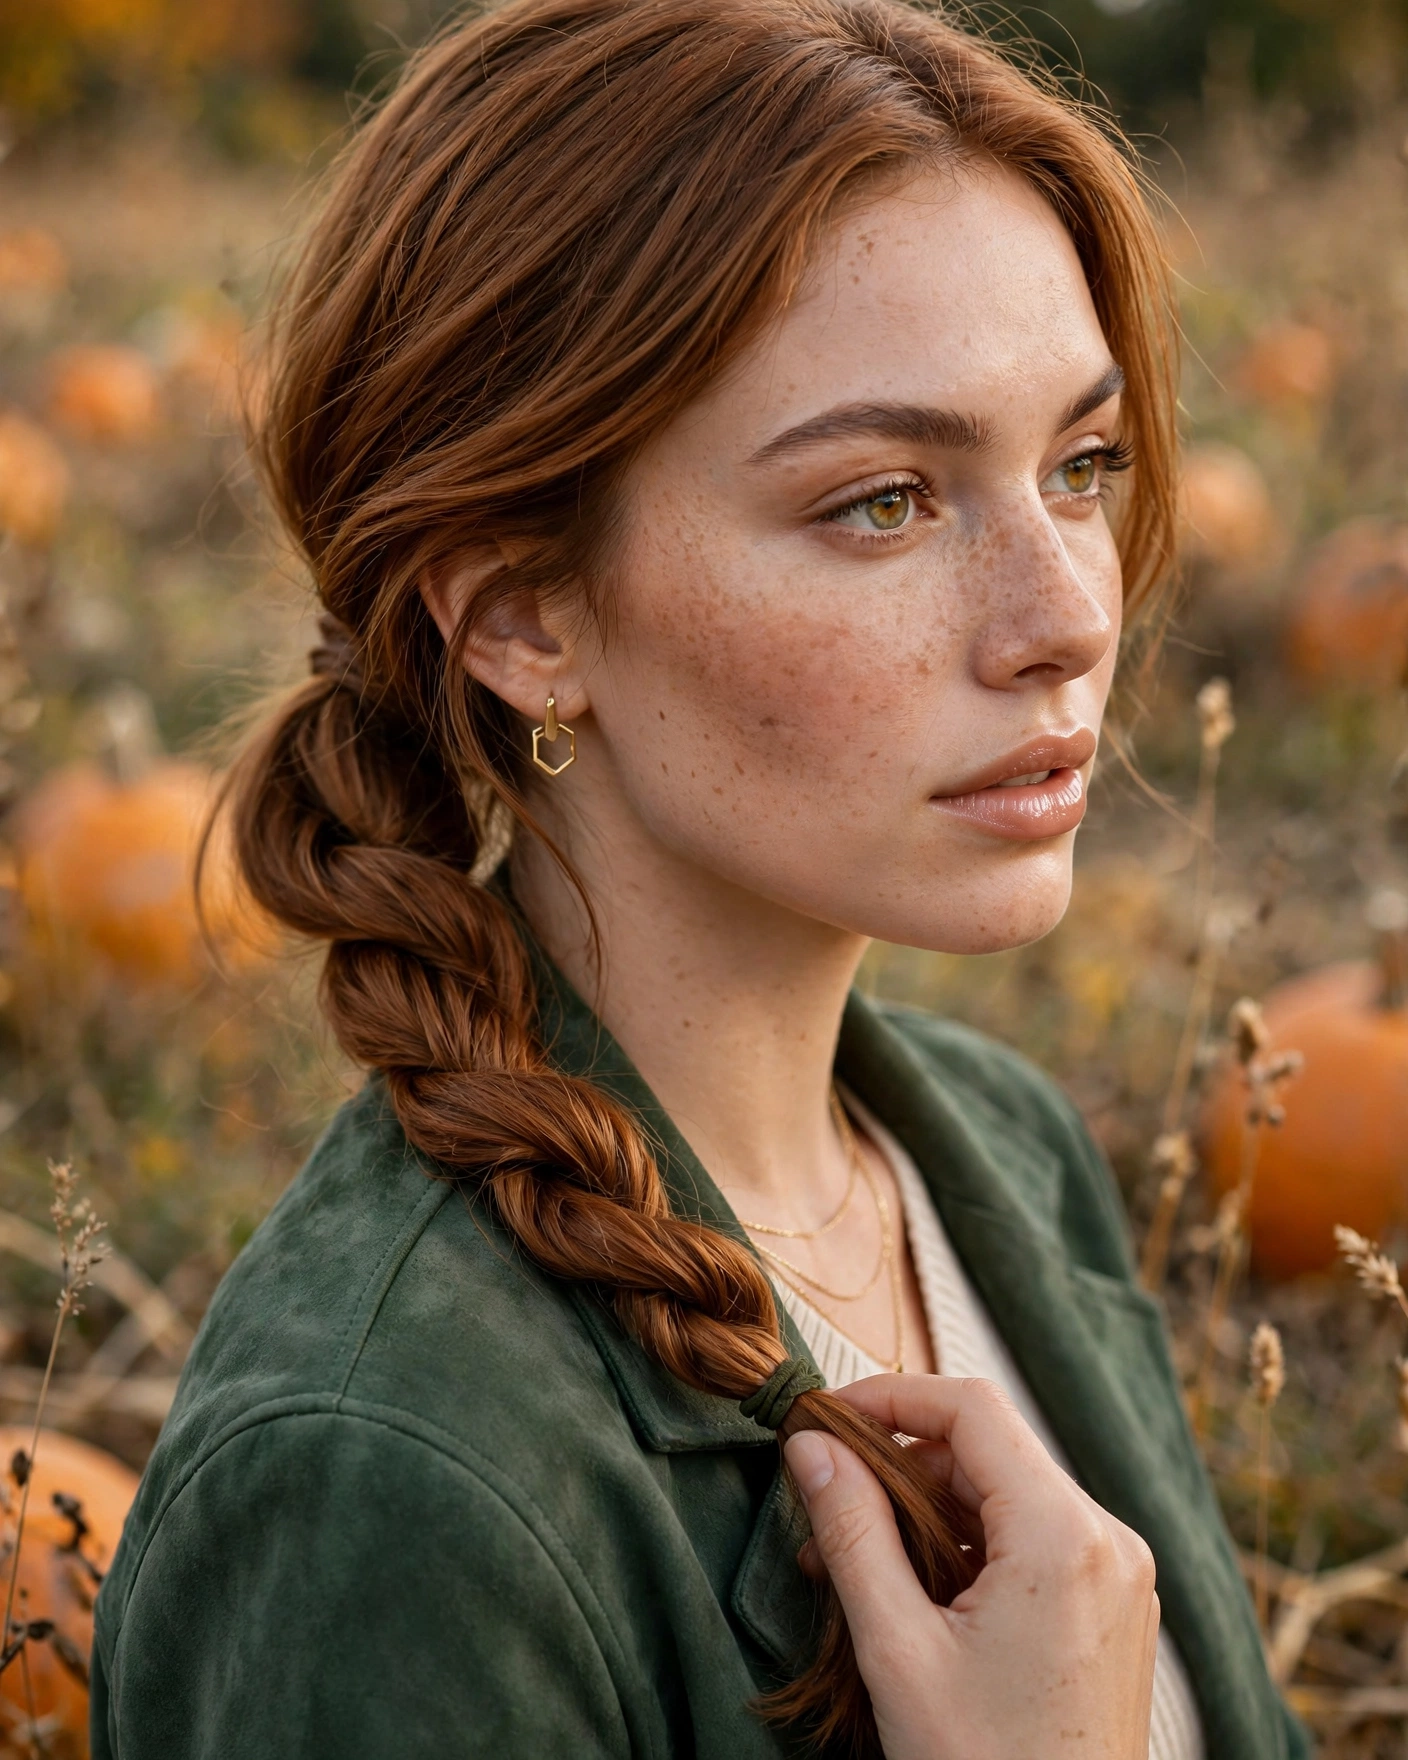
The side placement makes the hairstyle easy to show in photographs, and the twisted structure helps keep long lengths organized in the wind. It works particularly well with straight or lightly wavy hair, although textured hair can create a fuller result. If you want a seasonal accent, wrap a narrow ribbon around the base or use a small elastic in a warm autumn shade. Keep the ponytail comfortable rather than pulling it tightly against your scalp. If shorter layers escape, smooth them with a little styling cream or secure only the most noticeable pieces with discreet pins.
8. Curly Side-Part Shape with Decorative Clips
Naturally curly hair can look beautifully styled with a side part and a pair of decorative clips. Start by creating a side part that works with your natural curl pattern, then gently arrange the fuller side so the curls fall around your face. Place one or two lightweight clips above the ear on the opposite side, securing only a small section rather than flattening a large area. Keep the rest of the curls loose and defined using your usual styling routine.
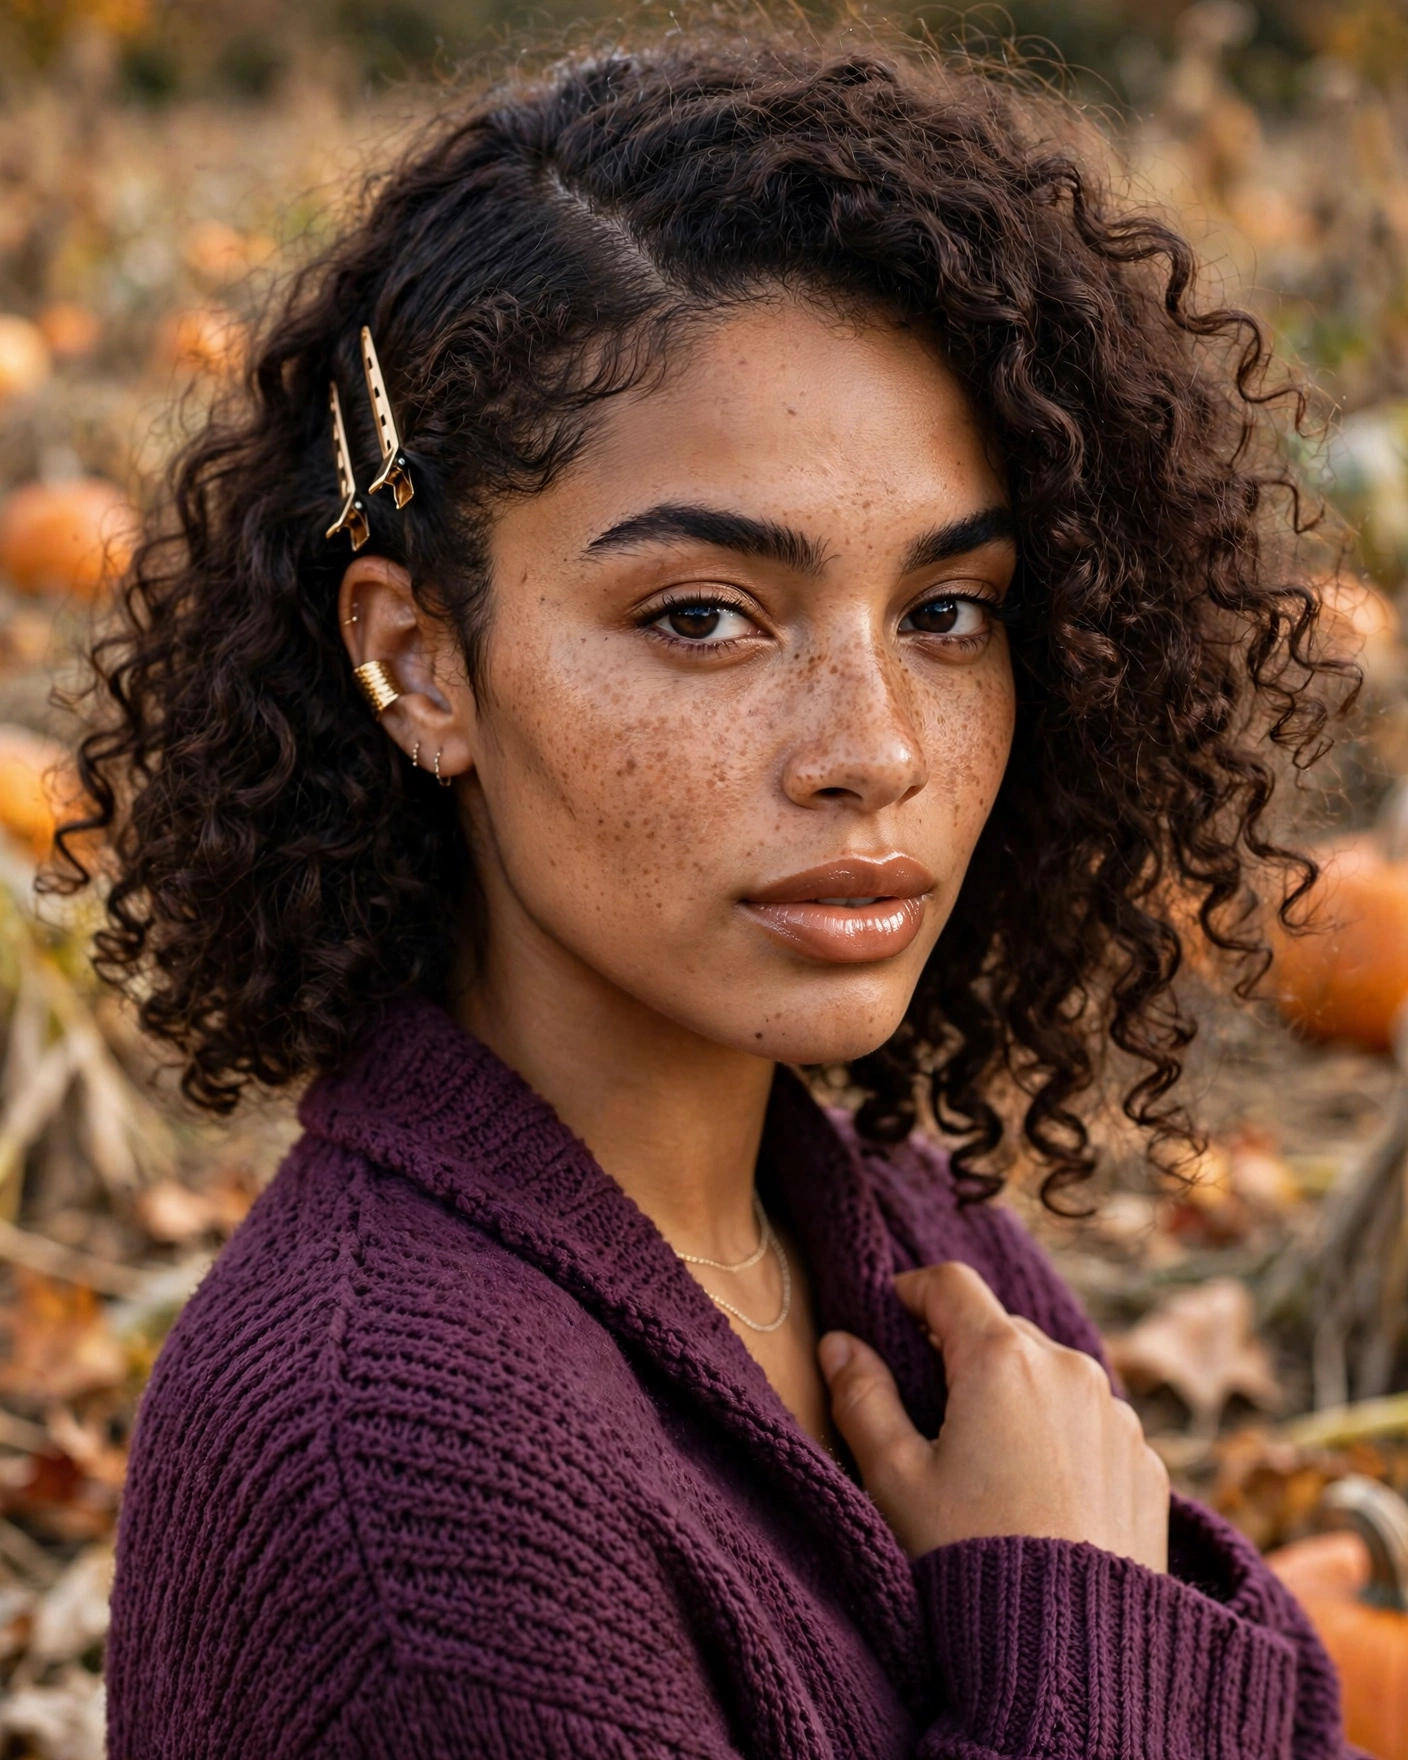
This look is easy because it does not require gathering or reshaping the whole head of hair. The clips add a clear visual detail while the curls provide natural volume and texture. Choose simple metallic clips, small flowers, or colorful designs depending on your outfit. To reduce frizz, avoid brushing dry curls after styling; use your fingers to arrange individual sections instead. This hairstyle is especially photogenic from a three-quarter angle, where the side part, accessories, and curl definition can all be seen. Lightweight clips are important because heavier accessories may slide out or pull on delicate curls.
9. Short Bob with an Ear-Tucked Finish
An ear-tucked bob is one of the easiest ways to style short hair while showing off the haircut’s shape. Create a natural part, then gently tuck one side behind your ear and allow the opposite side to fall forward. If the hair keeps slipping, secure it with a small flat pin hidden just behind the ear. You can keep the ends straight for a clean look or add a subtle bend to create a little movement around the jawline.
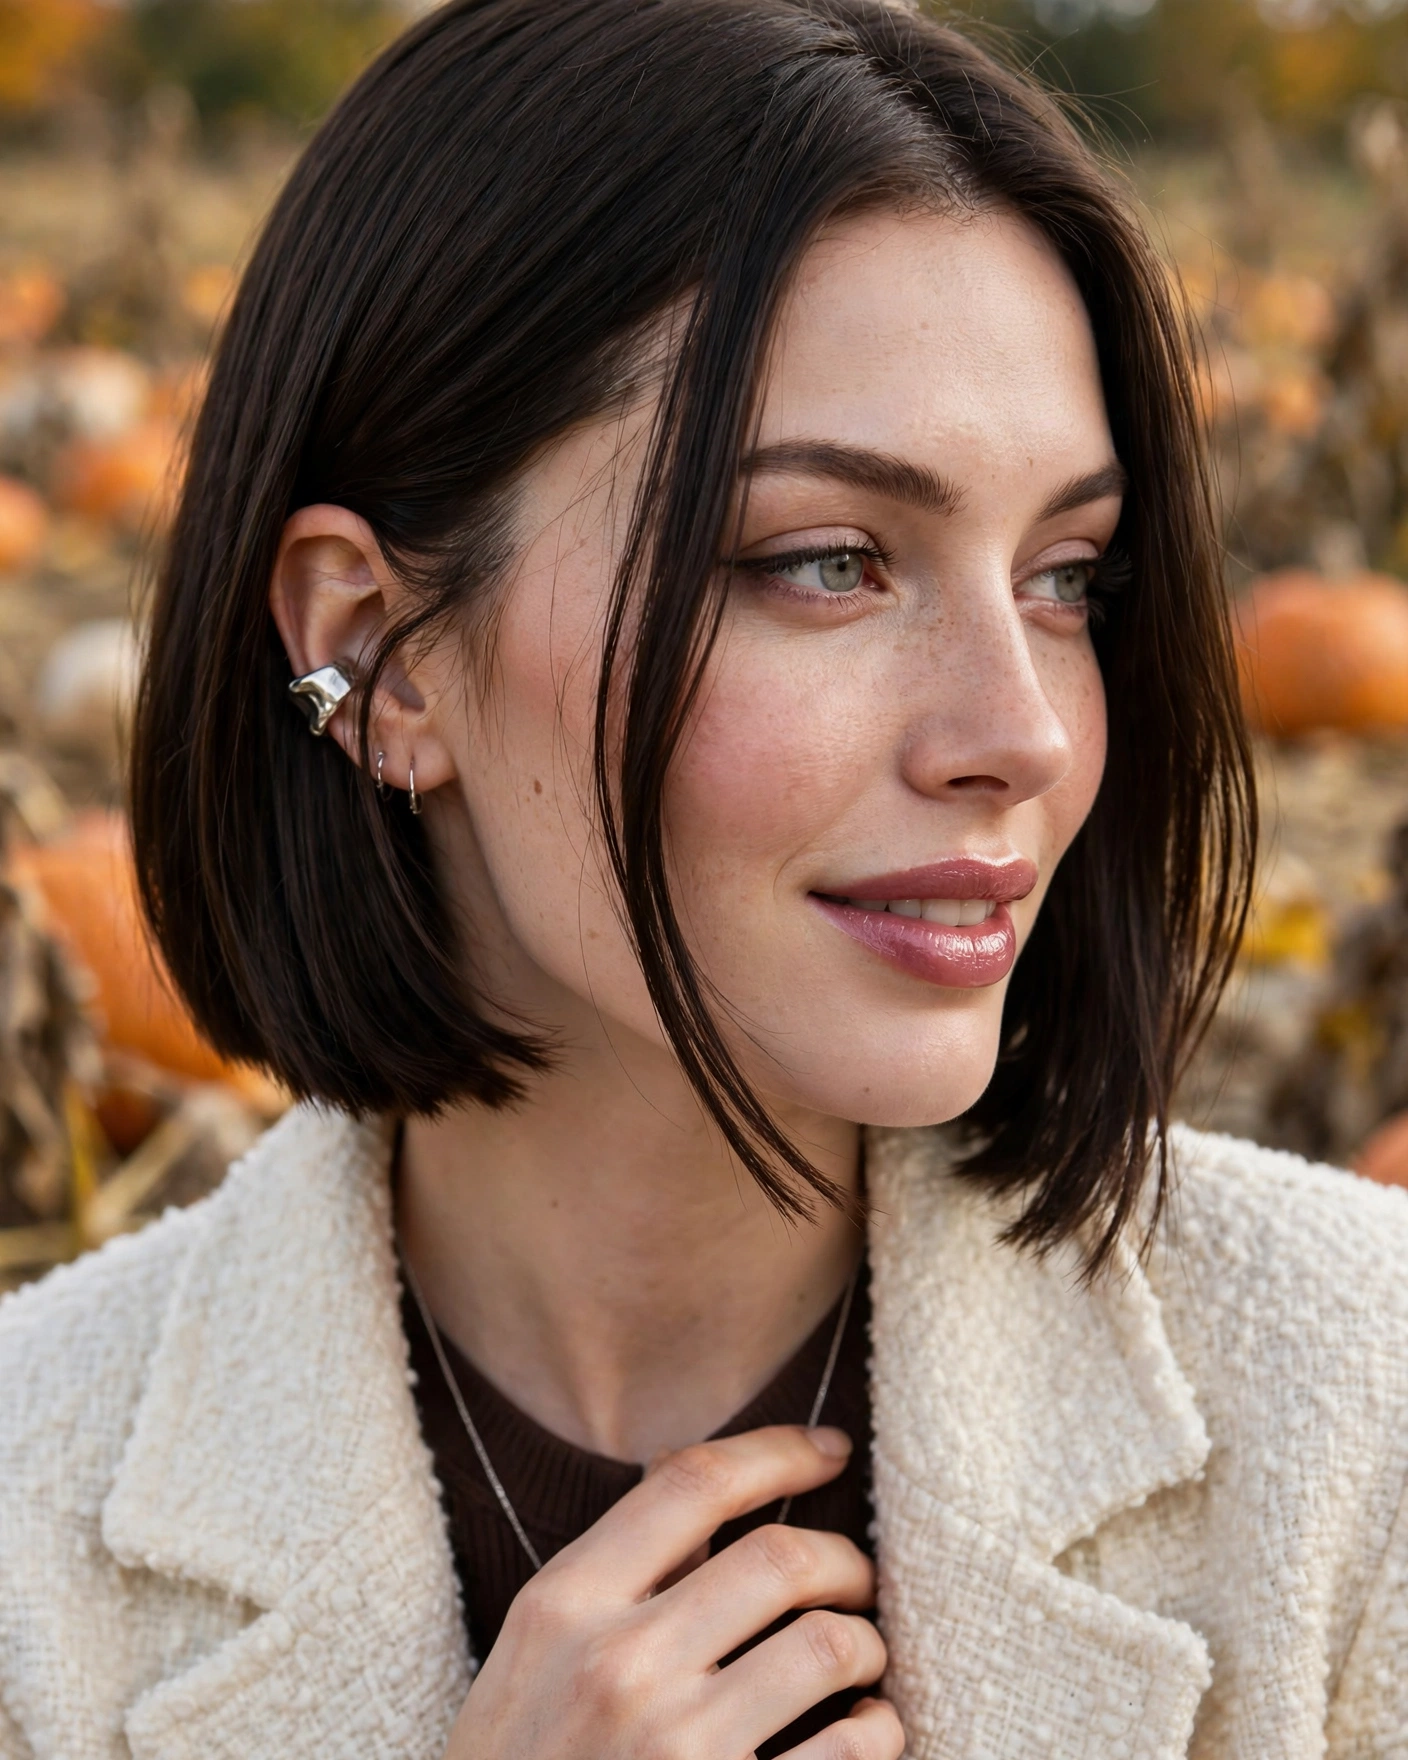
This hairstyle works well when you want something simple that still looks deliberate in photos. The asymmetry creates interest without requiring braids, ponytails, or complicated sections. It also pairs well with earrings, making small accessories part of the overall look. If your bob has layers, use a light styling product to help the tucked side stay in place without flattening the crown. The style is particularly convenient for outdoor outings because it keeps one side clear of your face while allowing the rest of your haircut to move naturally. For pictures, turn slightly toward the tucked side to show the clean line around the ear.
10. Medium-Length Bubble Ponytail
A medium-length bubble ponytail creates playful sections without needing extremely long hair. Gather your hair into a mid-height or low ponytail and secure it with an elastic. Add two or three more elastics down the length, spacing them according to how much hair you have available. Gently pull the sections outward to create rounded bubbles. Keep the bubbles moderate in size so the ponytail looks balanced and does not become too bulky.
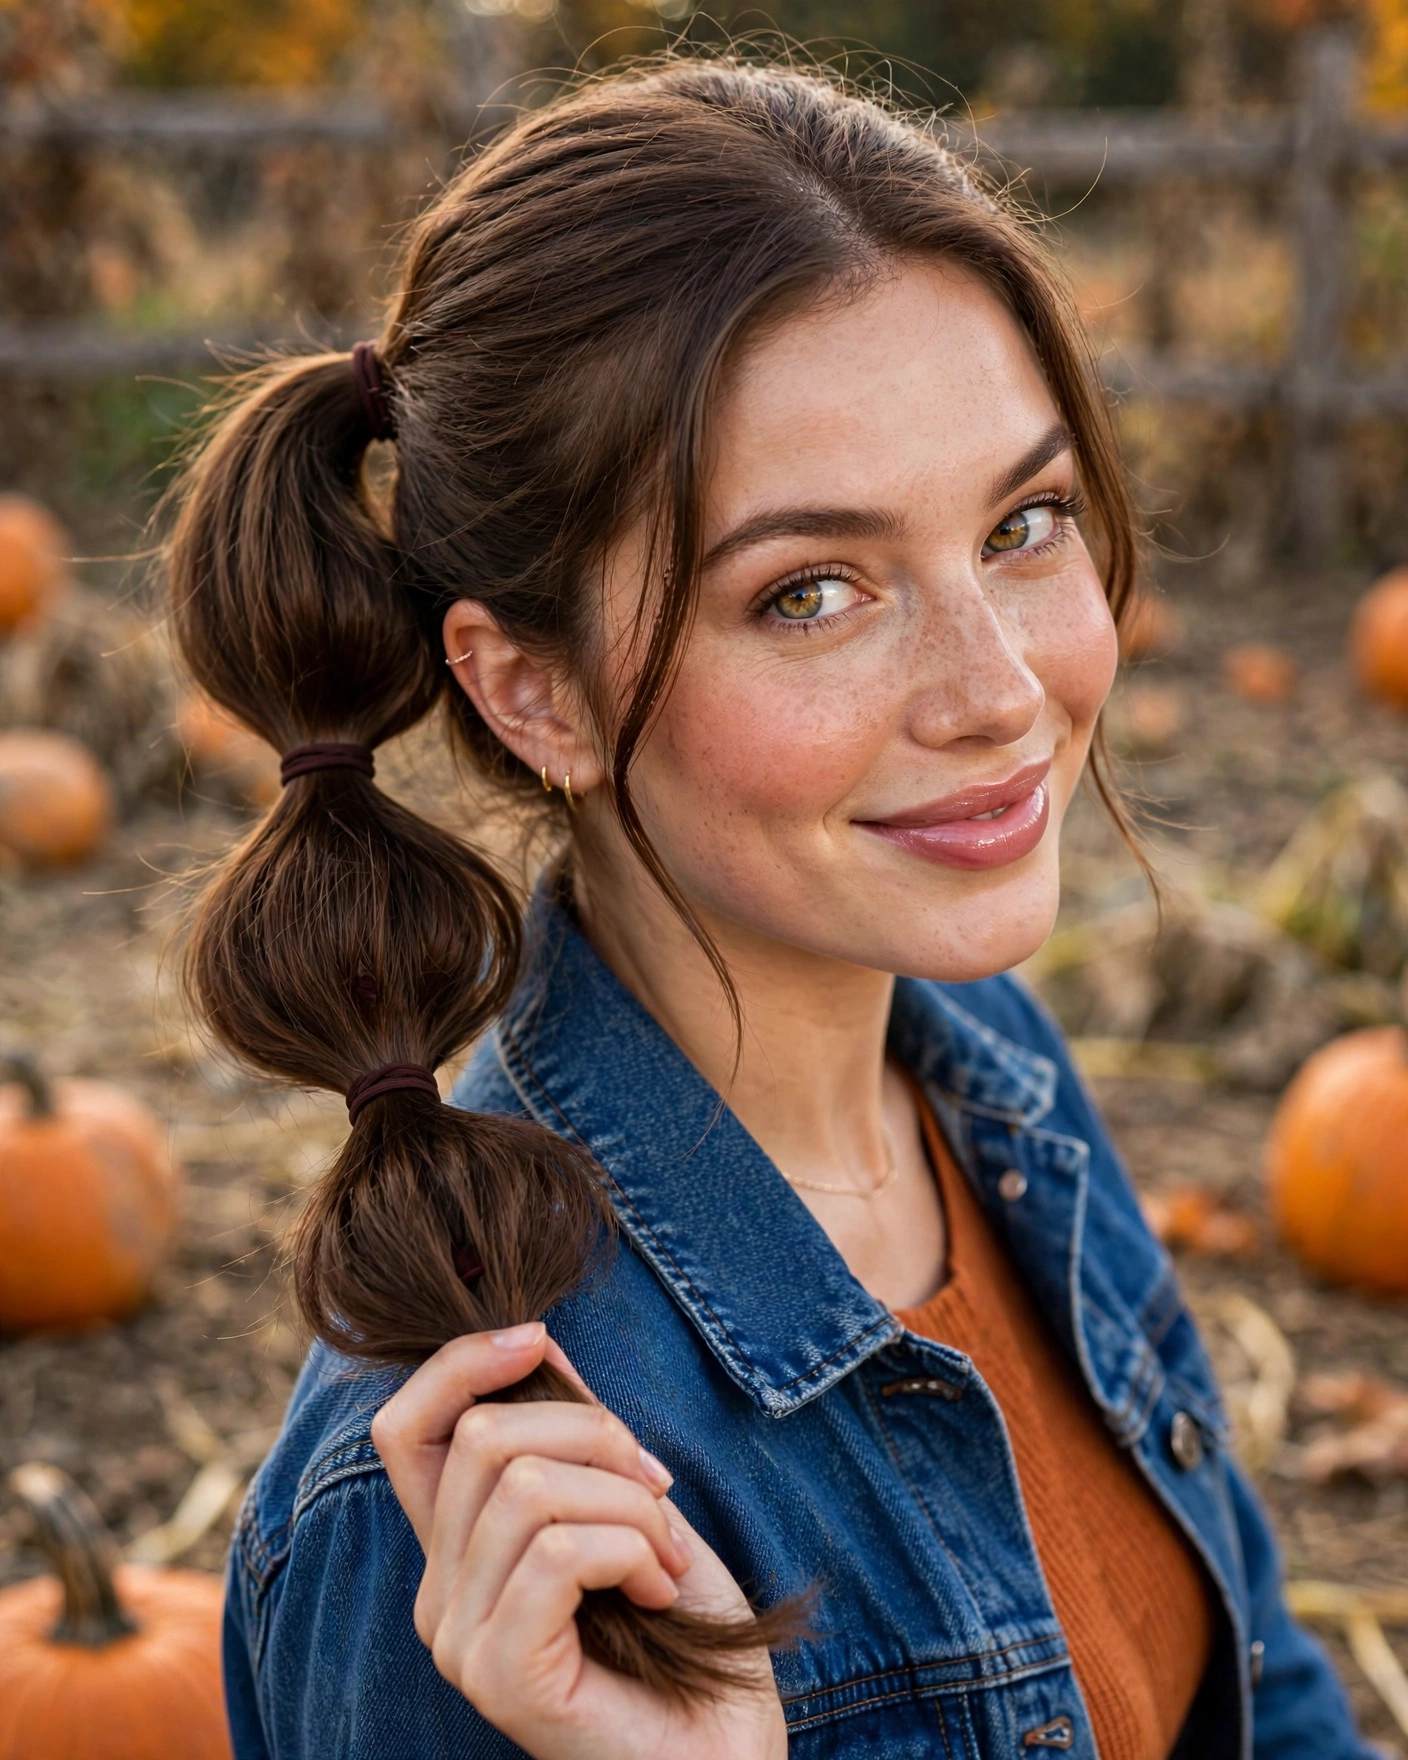
This hairstyle works well for a pumpkin patch outing because it adds visual interest while keeping the hair gathered. Choose clear elastics for a simple finish or use autumn-inspired colors for a more playful effect. If your hair is layered, the bubbles may loosen slightly, so a little texturizing product can help improve grip. Avoid placing the ponytail too high if you plan to wear a hat or rest your head against anything. For photographs, a side angle shows the bubble sections clearly, while a back view highlights the ponytail’s full shape. It is a useful option when you want something more distinctive than a basic ponytail but still quick to create.
11. Short Hair with a Mini Half-Up Knot
A mini half-up knot is a cute styling option for short hair that has enough length at the crown to gather a small section. Take the upper front section of your hair and bring it toward the back, twisting it into a small loop or knot. Secure it with a tiny elastic or a couple of discreet pins, leaving the sides and lower layers loose. Keep the knot compact so it does not feel heavy or overwhelm the shape of your haircut.
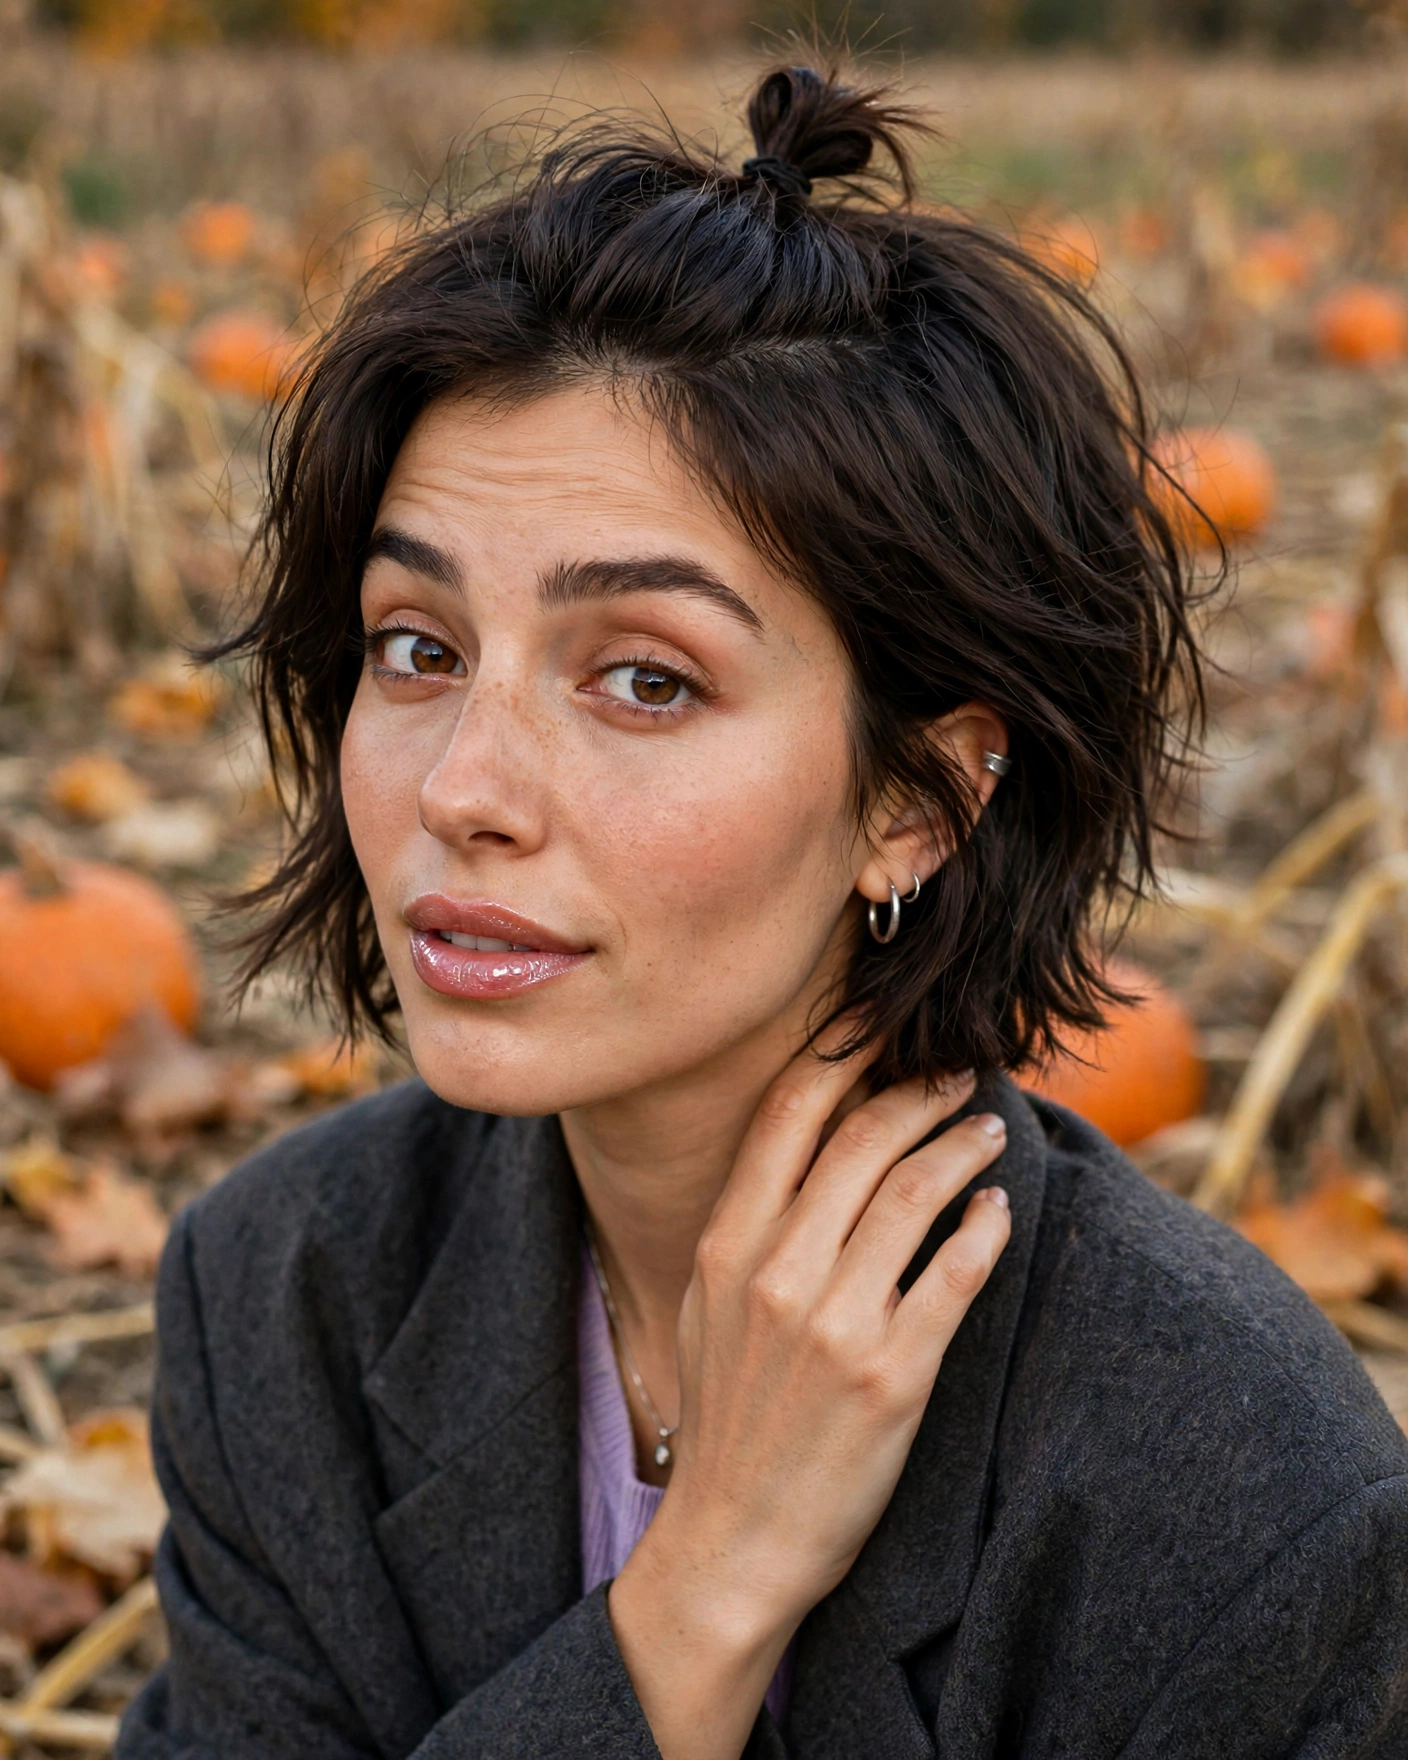
This look adds a playful focal point while keeping the majority of your short hair down. It works especially well for a grown-out pixie, a short bob, or a layered cut with enough length at the top. A tiny clip can hide the elastic, but the knot itself can also stand alone. If the hair is slippery, add a little texture before gathering it. Avoid forcing short strands into a tight knot, since that can create discomfort and make the shape fall apart. The finished style is casual and youthful, and it photographs well from the side because the small gathered detail remains visible above the loose hair.
12. Long Hair with a Loose French Braid
A loose French braid is ideal for long hair when you want a hairstyle that looks detailed but is still practical for outdoor activities. Begin at the crown with three sections and gradually add hair from both sides as you braid down the back. Keep the braid relaxed enough to show its woven structure, then secure the end with a small elastic. You can gently widen the outer edges to create a fuller finish, but avoid loosening it so much that the braid becomes unstable.

The style helps control long lengths, making it useful on breezy days when loose hair may tangle around clothing. It also gives the back of your hairstyle a clear pattern that looks beautiful in photos. Leave a few short strands around the face if you prefer a softer appearance, and choose a simple elastic or a narrow ribbon for the end. If your hair is very slippery, a light texturizing spray can improve grip before braiding. For a natural look, allow a little texture rather than smoothing every strand perfectly flat. This braid can be dressed up or down depending on your outfit and accessories.
13. Naturally Curly Low Puff with a Side Part
A low puff with a side part is a comfortable option for naturally curly or coily hair when you want your texture gathered but still prominent. Create a side part, then gently collect the hair toward the back of your head at a low or mid-low position. Secure it with a soft hair tie that accommodates your hair thickness, allowing the curls to form a rounded puff. Keep the front section smooth only as much as your preferred styling routine requires, and let some natural texture remain visible around the hairline.
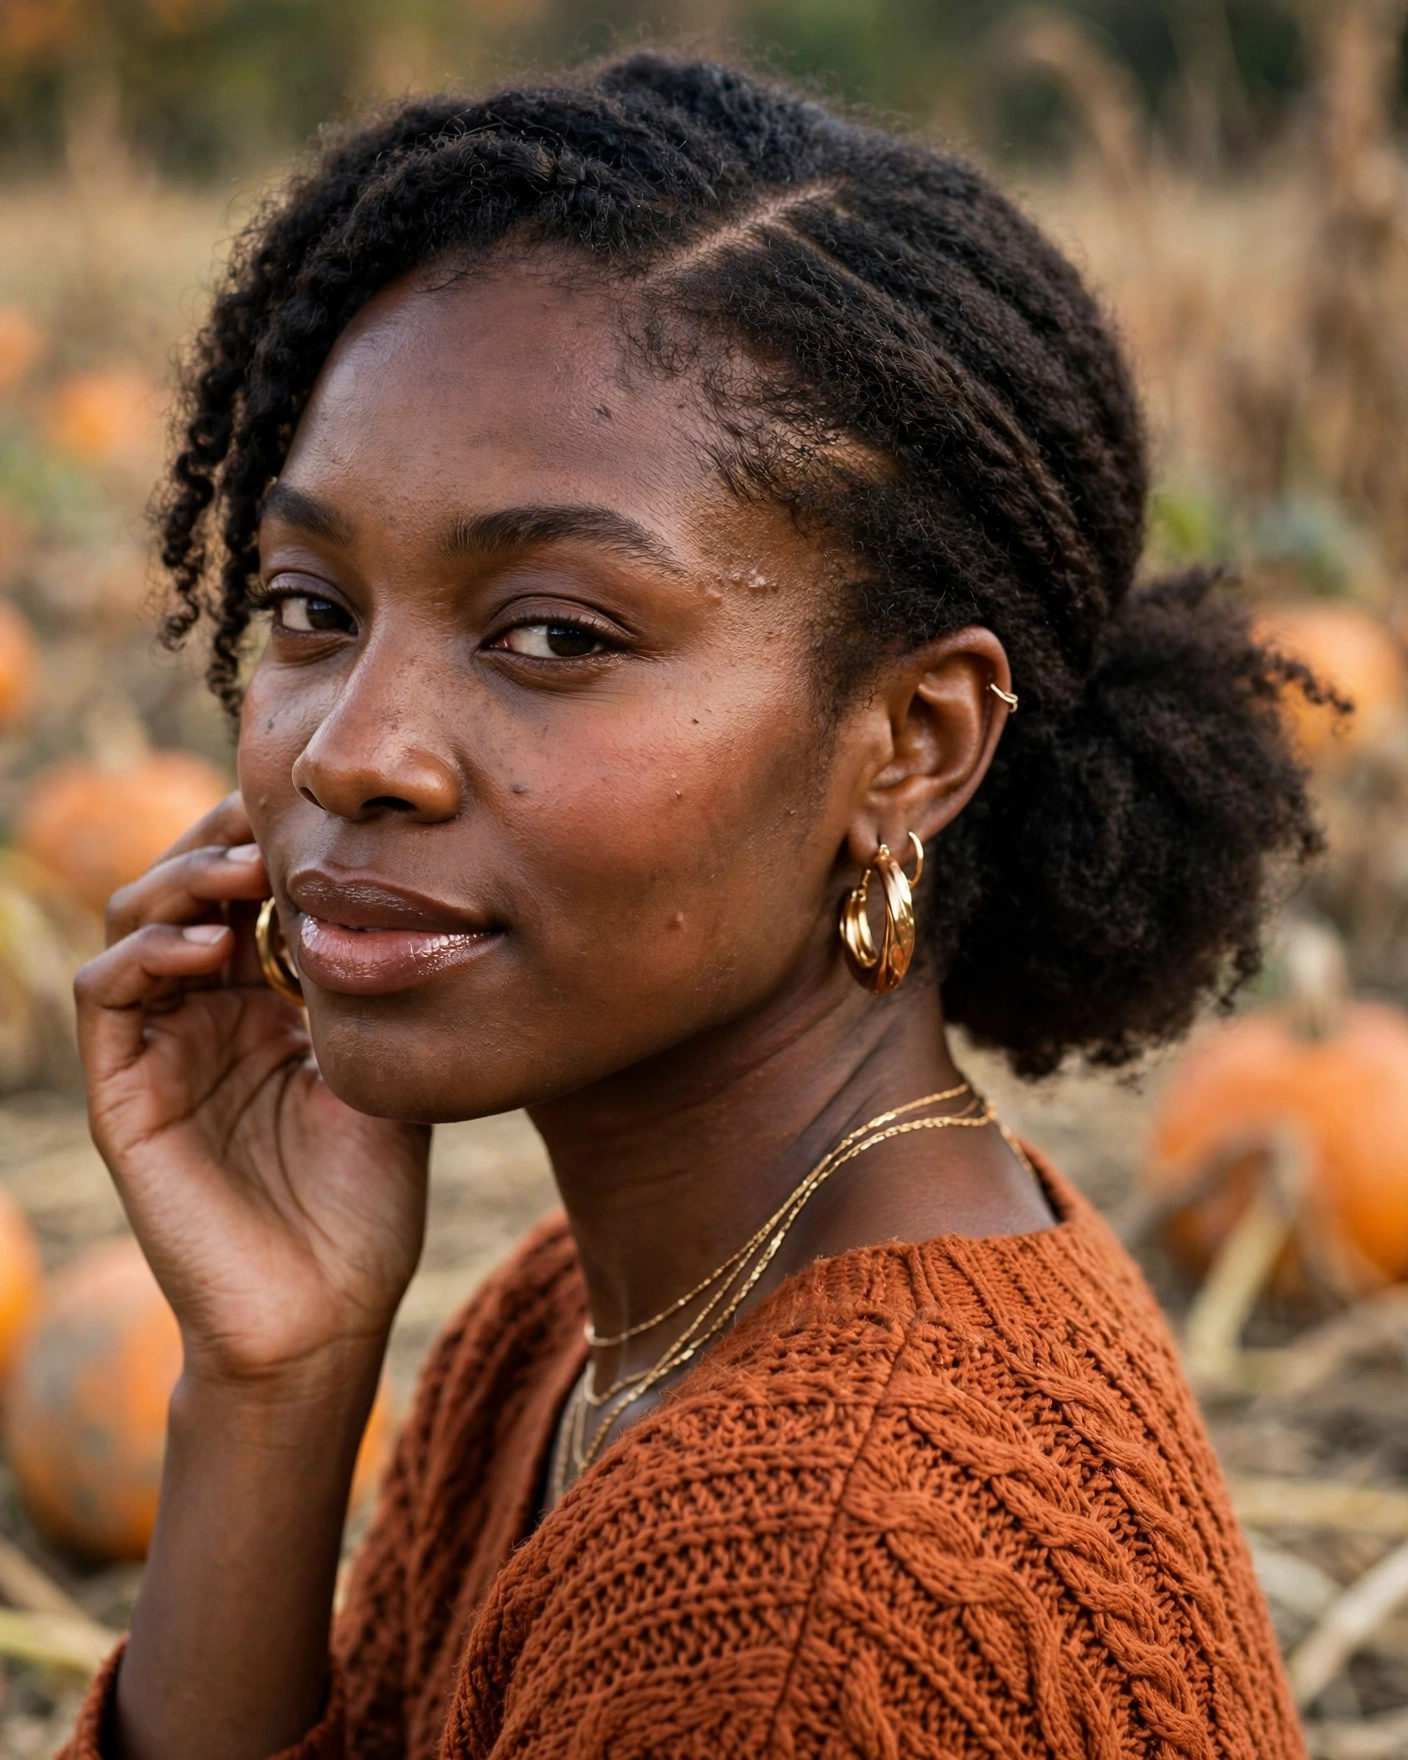
The lower placement gives the hairstyle a balanced silhouette and can be easier to manage than a high puff during an outdoor outing. It also leaves room for hats or hoods when the weather changes, provided the gathered shape does not interfere with the fit. Use your usual moisturizing products and avoid pulling the curls too tightly. A few small clips can secure stray sections if needed, but the natural curl pattern should remain the focus. For photos, turn slightly sideways so the side part and rounded puff are both visible. The look is simple, practical, and designed to work with your natural texture rather than against it.
14. Medium Hair with a Claw-Clip French Twist
A small claw-clip French twist is a quick solution for medium-length hair when you want it gathered away from your neck. Collect the hair at the back, twist it upward, and fold the ends inward before securing the twist with a claw clip. Choose a clip size that holds your hair securely without creating a large bump. If your hair is too short for a full twist, gather only the upper and middle sections, leaving the lower ends loose for a half-up variation.

This style is convenient because it can be adjusted quickly if the weather changes or you want to refresh your look before taking pictures. A tortoiseshell, amber, or neutral clip complements autumn outfits, while a brighter color creates a more playful effect. Keep the twist relaxed rather than tightly pulling the roots backward. If shorter layers escape, tuck them gently around the clip or leave them loose for a softer finish. The hairstyle works best when the clip is comfortable against the back of your head and does not catch on collars. It offers a tidy shape without requiring pins or a complicated styling routine.
15. Long Hair with a Low Double-Twist Ponytail
A low double-twist ponytail gives long hair a decorative structure while staying easy to manage. Begin with a low ponytail and divide the hair just above the elastic to create a small opening. Flip the ponytail through that opening once, then repeat the process slightly lower if your length allows. The result is a series of gentle twists along the upper part of the ponytail. Secure the style carefully and allow the remaining lengths to fall naturally.
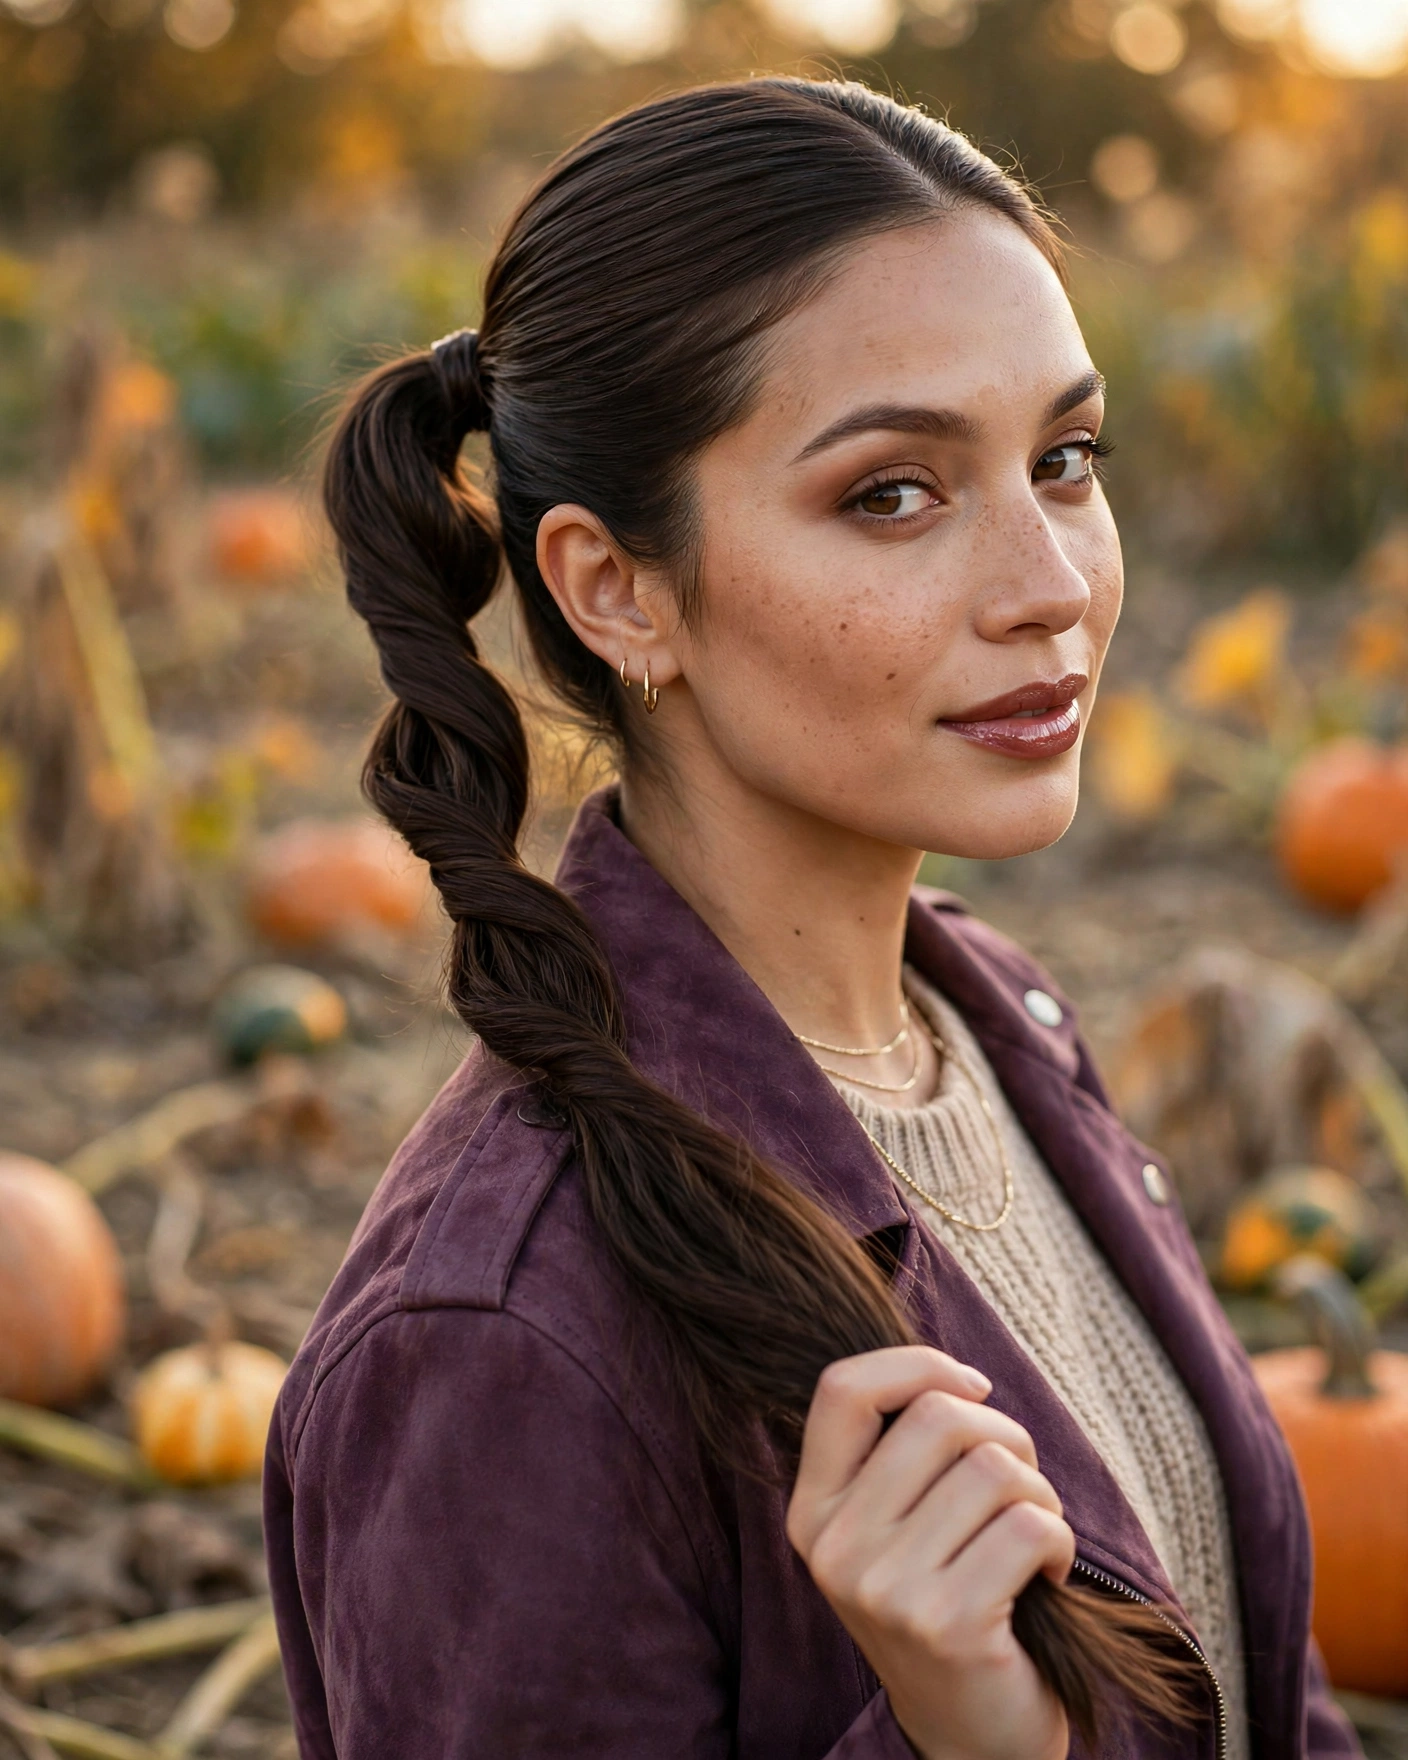
This technique creates visual detail without needing a full braid or multiple accessories. It is especially useful when you want long hair controlled at the top but still visible down the back. The twists help the style look more finished in photos, while the low placement keeps it comfortable for walking around outdoors. A small ribbon tied near the base can add an autumn touch, although the hairstyle works well without one. If your hair is very thick, keep the twists loose enough to avoid excessive tension. Check the elastics before leaving so the sections remain secure throughout your outing.
16. Short Curly Hair with a Decorative Side Pin
Short curls can look polished with just one well-placed side pin. Arrange your curls using your regular styling product, then create a subtle side part or follow the direction your curls naturally fall. Select a small section above one ear and secure it with a decorative pin, allowing the curls around the crown and opposite side to remain full. A small flower, pearl pin, or simple metallic accessory can create a focal point without weighing down the hair.

This style works particularly well for short natural curls that cannot easily be gathered into a ponytail. It keeps one side visually organized while celebrating the haircut’s natural shape. Choose a lightweight pin with a secure fastening so it stays in place as you move. Avoid brushing the curls into a flat shape; gently separate them with your fingers if you need to adjust the silhouette. The style is easy to refresh before a photograph and pairs well with simple autumn outfits. For the best angle, turn the side with the pin slightly toward the camera so the accessory and curl texture are both visible.
17. Medium-Length Hair with a Ribbon-Wrapped Low Ponytail
A ribbon-wrapped low ponytail is an easy way to make medium-length hair feel more seasonal. Gather the hair at the nape and secure it with an elastic. Take a narrow ribbon and wrap it around the ponytail base, tying it into a small bow or leaving two short ends hanging down. Keep the ponytail itself loose and natural, with a slight bend at the ends if you want extra movement.
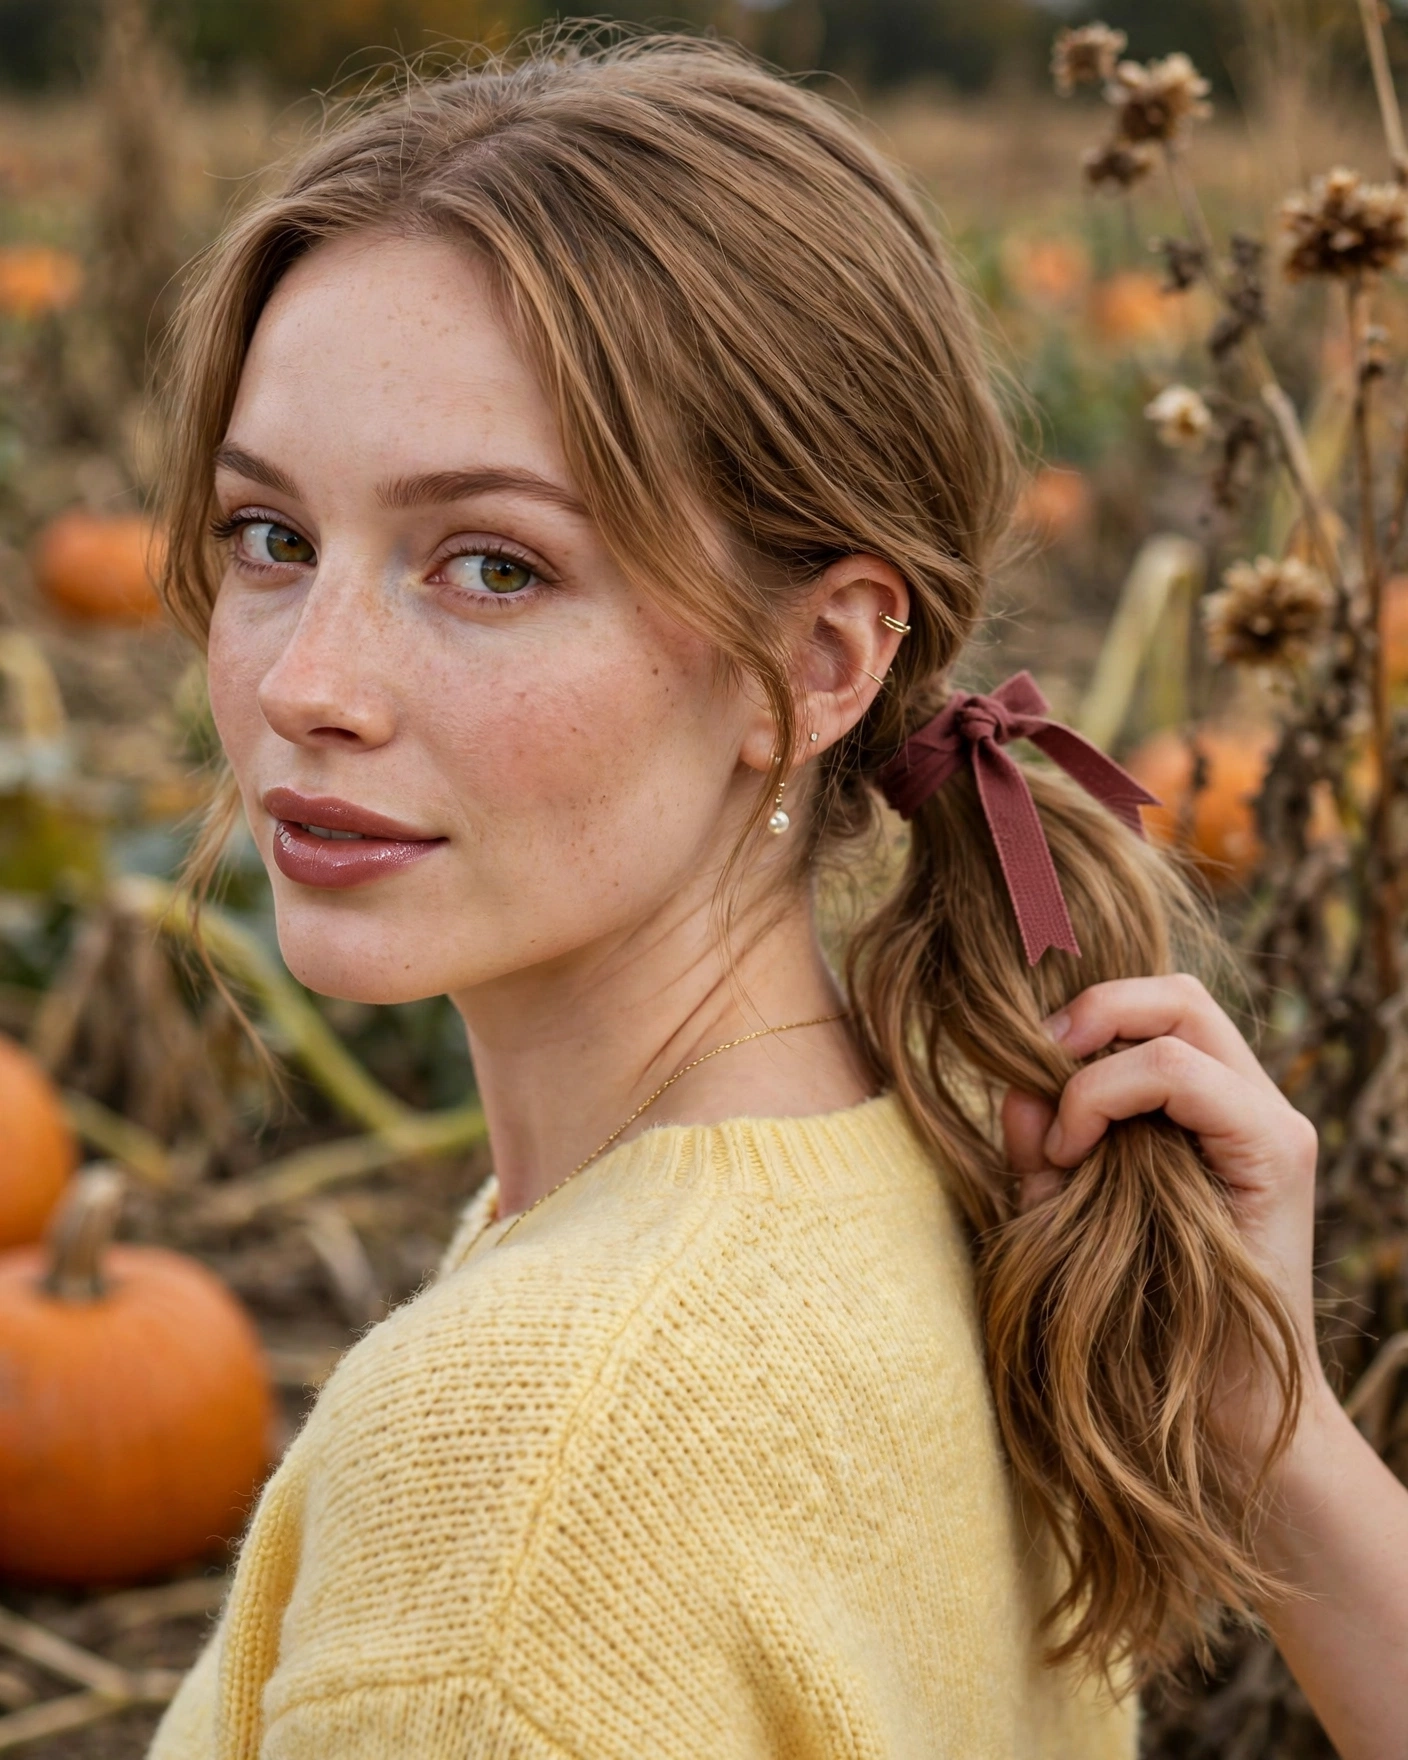
This style is useful when you want a cute finishing detail without spending time creating a complicated braid. The ribbon can complement your outfit in a subtle way, with cream, rust, burgundy, or dusty pink all working well for autumn. If your hair is layered, a little smoothing cream can help shorter pieces stay near the base. Make sure the ribbon is tied securely enough to last but not so tightly that it pulls on the hair. The ponytail sits low, making it comfortable for outdoor activities and easy to pair with scarves or high collars. In photos, the bow adds a clear detail while the lengths keep the look relaxed.
18. Long Natural Waves with a Front Twist
Long natural waves can be styled with a simple front twist when you want to keep hair away from your face without gathering the entire length. Take a small section near one temple and twist it backward, adding a little hair as you move toward the area above the ear. Secure it with a discreet pin, then let the rest of your waves fall freely. You can create the twist on one side for an asymmetrical look or repeat it on both sides for a balanced half-up effect.
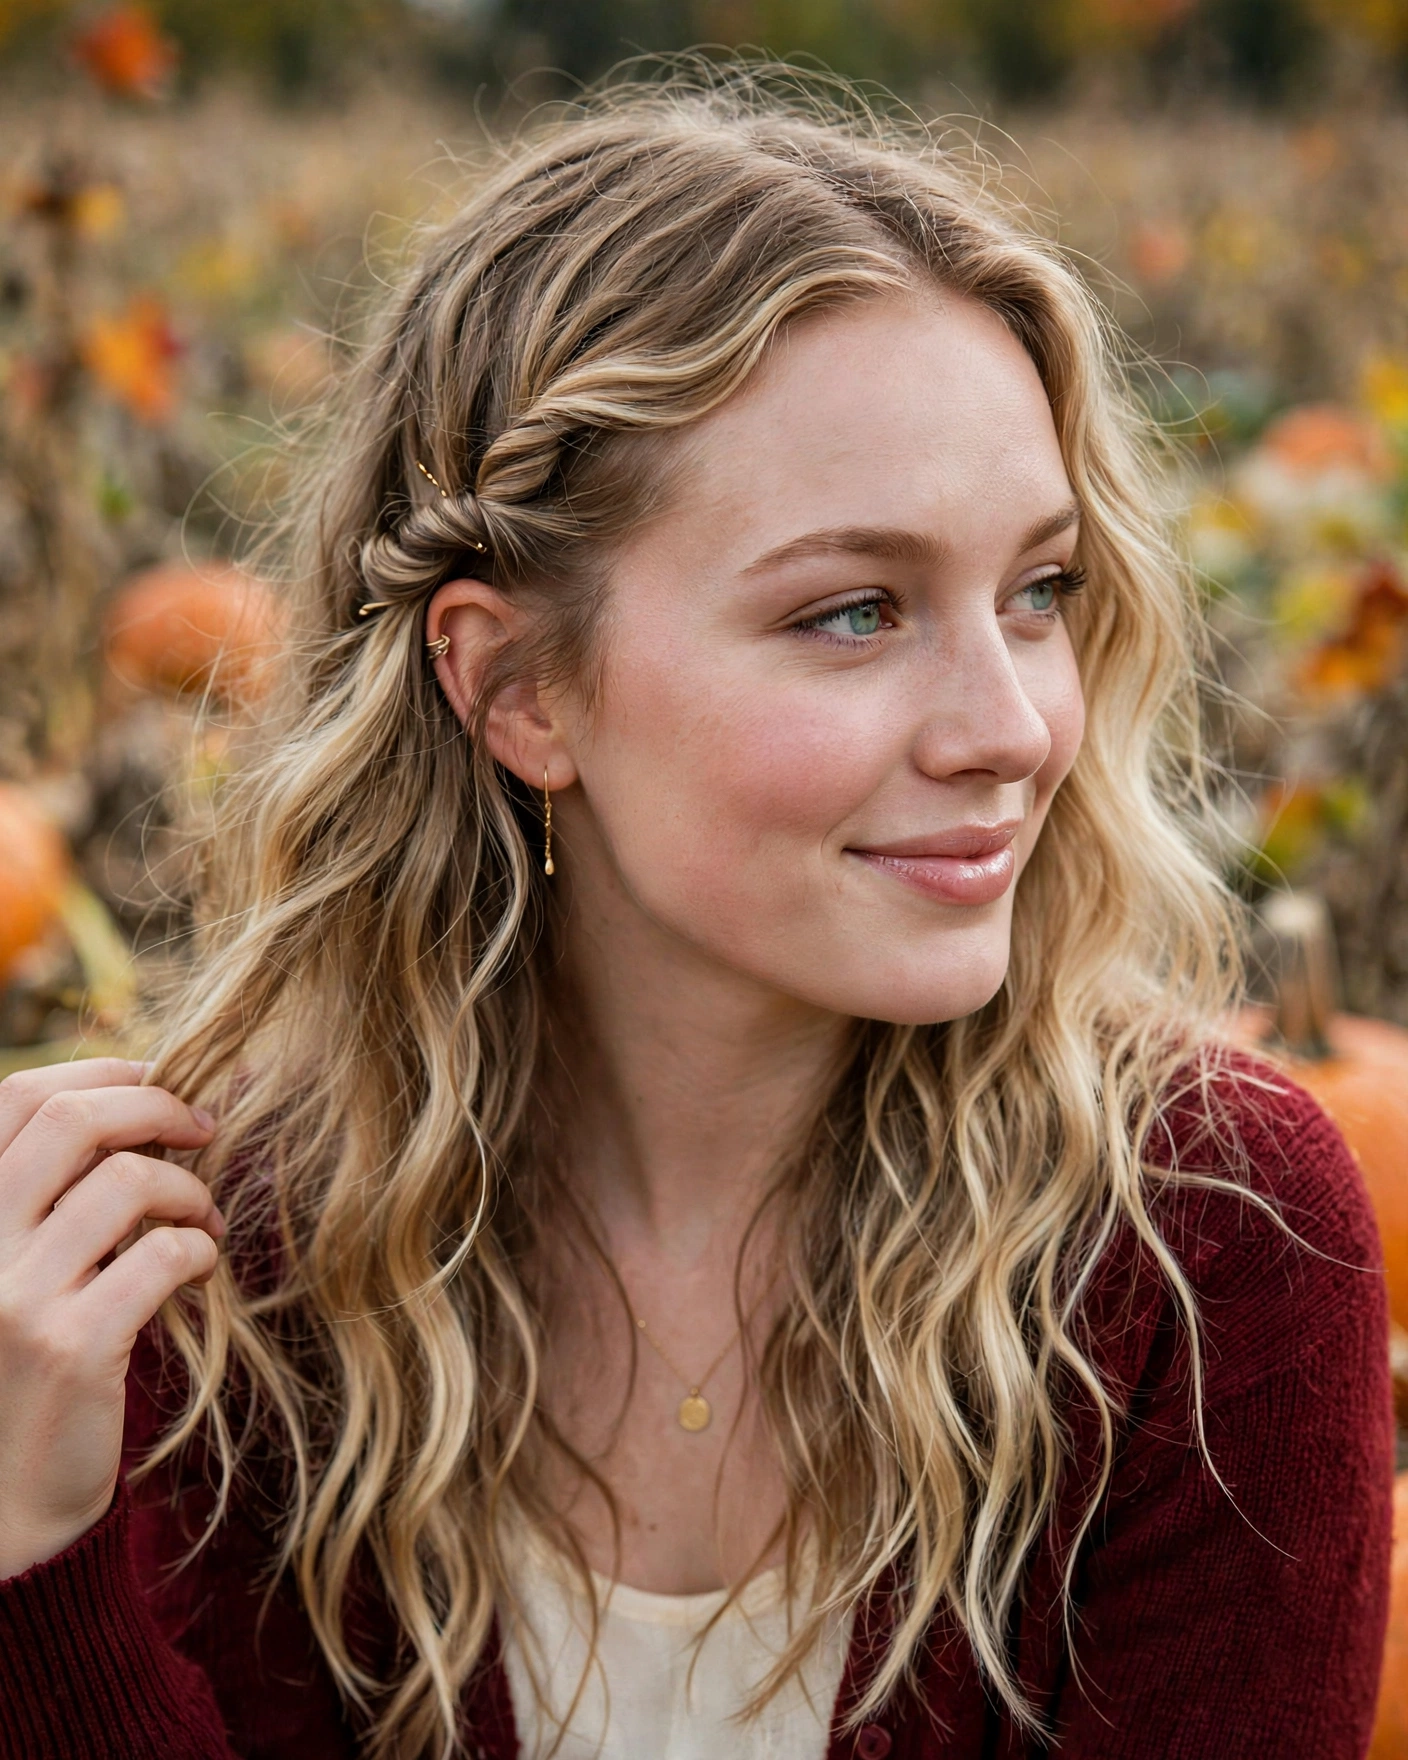
The style preserves the movement of long hair while introducing a detail that shows clearly in close-up photos. It is also easy to adapt: the twists can be very small for a subtle effect or slightly wider for more visible texture. Use a flexible product if your hair tends to slip out of twists, but avoid making the sections stiff. This hairstyle works with naturally wavy hair and can also be created on straight hair with a little added bend. For outdoor pictures, position your face at a three-quarter angle so the twist remains visible while the loose lengths move naturally over your shoulders.
19. Curly Hair with a Loose Side Braid
A loose side braid is a useful way to gather longer curly hair while allowing the texture to remain visible. Start by bringing your curls over one shoulder and separating them into three broad sections. Braid gently, avoiding excessive tension that could stretch the curls or create an uncomfortable pull at the scalp. Secure the end with a soft elastic, leaving enough room for the braid to retain some fullness. If shorter curls escape along the sides, let them frame your face rather than trying to force every strand into the braid.
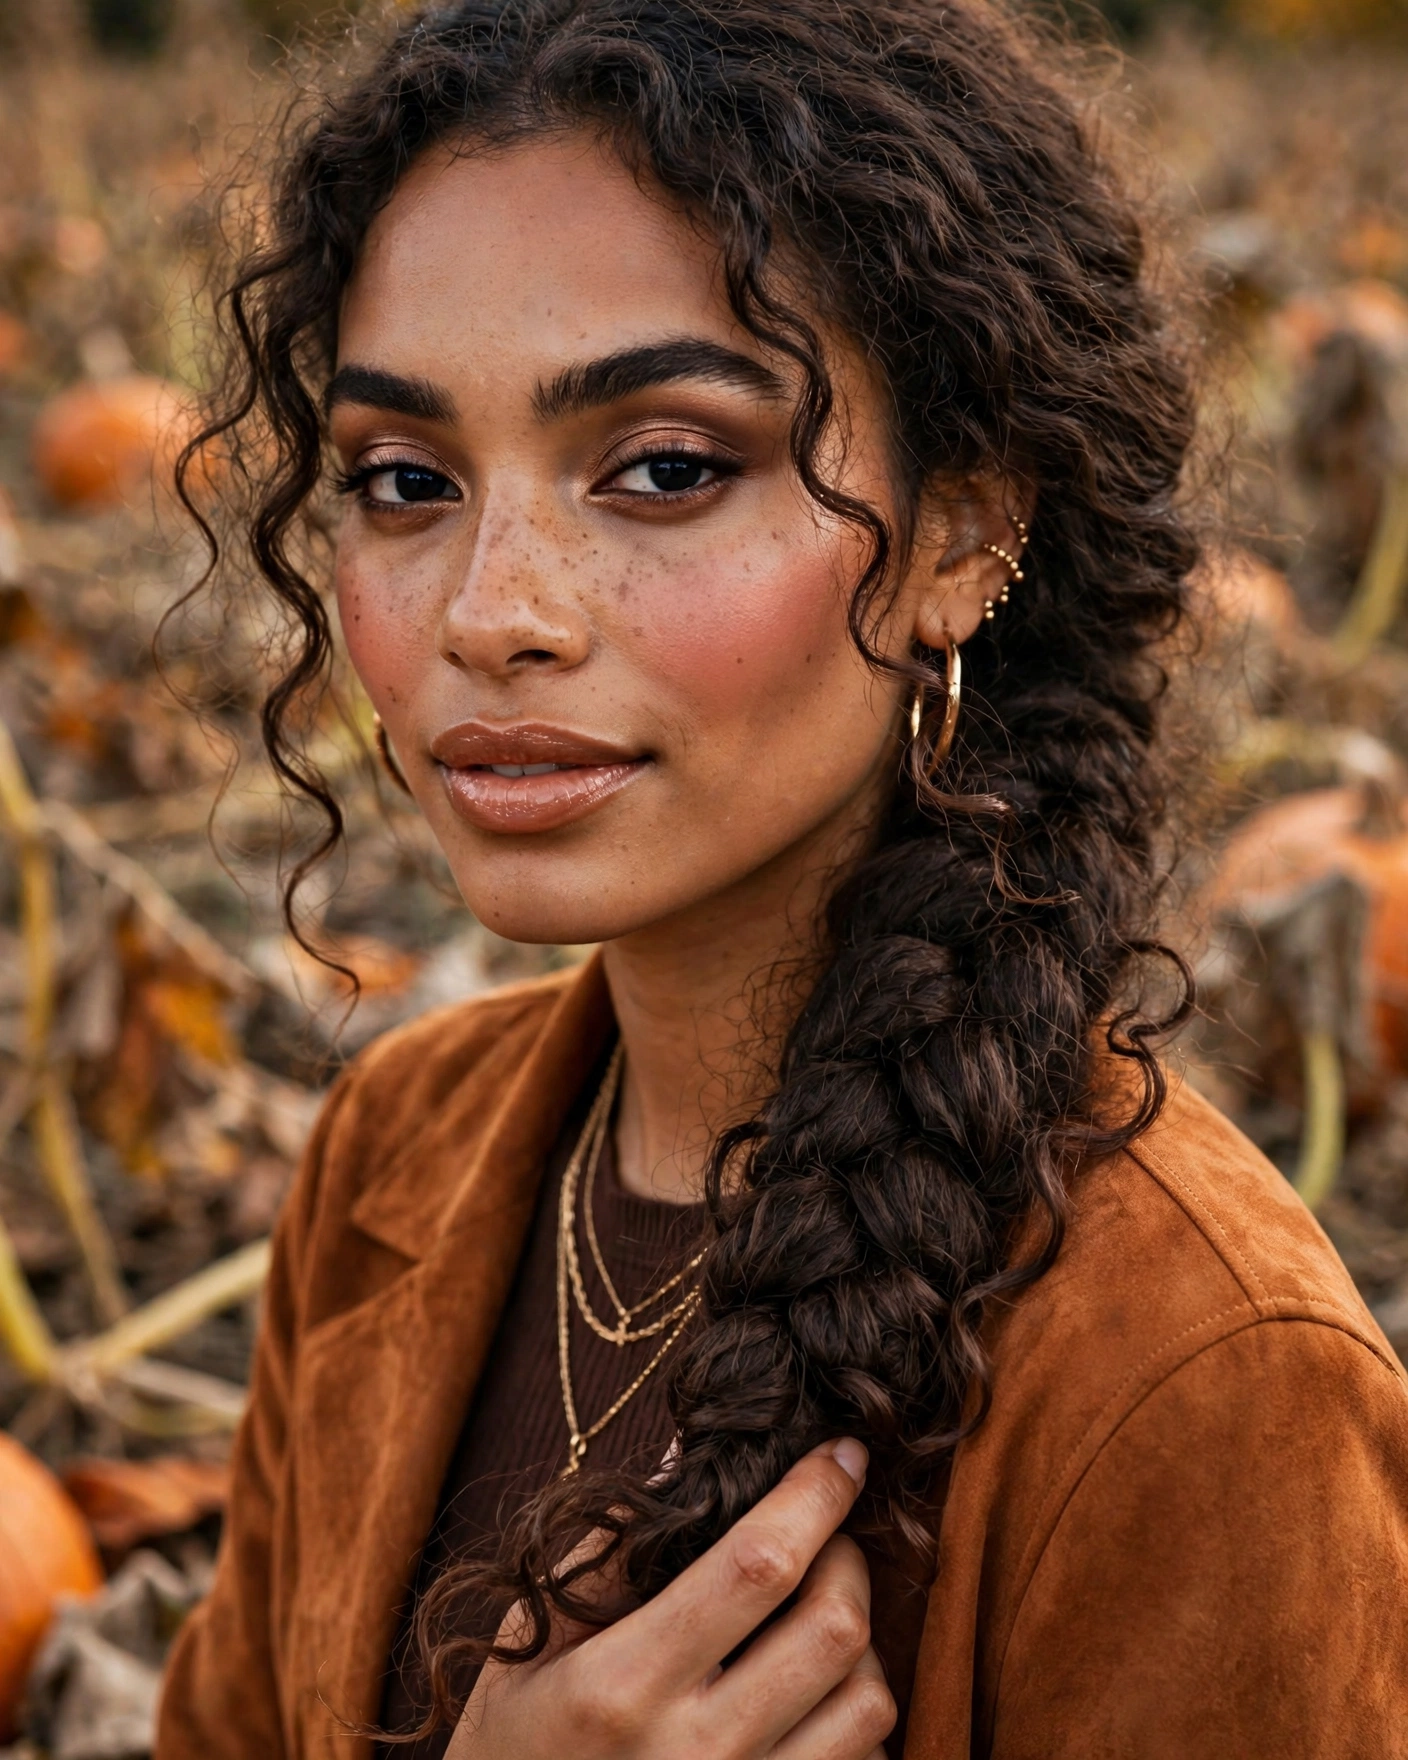
This hairstyle is particularly helpful for outdoor outings because it reduces tangling while keeping the hair away from the back of your neck. The braid’s texture can look beautiful in photographs, especially when some curls remain visible around the edges. Use your usual curl products before braiding and avoid brushing the hair dry. A simple elastic is often enough, although a small ribbon can add a decorative touch if desired. The style works best when it feels relaxed and comfortable, allowing your natural curl pattern to remain part of the final look.
20. Wind-Friendly Half-Up Twist with Secured Ends
A wind-friendly half-up twist is a practical final option for anyone who wants loose hair without constantly moving it away from their face. Take sections from both sides of your head and twist them backward, then secure them together with a small elastic or flat clip. Instead of leaving the ends loose, tuck them beneath the gathered section and fasten them with a discreet pin. Keep the lower hair down, but smooth the top lightly so the twists hold their shape.

This hairstyle works across short-to-long lengths, although the exact placement may need to change depending on your haircut. For short hair, use smaller sections and secure the ends carefully; for long hair, the twists can be wider and more visible. The secured ends help reduce loose pieces around the face when the breeze picks up, while the open lengths preserve a soft appearance. It pairs well with simple clips or a small bow, but it does not need extra accessories to look finished. Before heading out, turn your head gently to check that the pins feel secure and that nothing pulls uncomfortably.
How to Make Your Pumpkin Patch Hairstyle Last Outdoors
A cute hairstyle should be easy to wear, not something you have to fix every few minutes. A little preparation can help your hair hold its shape while you walk, take pictures, and enjoy the outing.
- Start with the right preparation: Use products suited to your hair texture. Lightweight styling cream can help smooth flyaways, while curl products can support natural definition.
- Choose accessories that fit your length: Short hair often works best with lightweight clips and pins, while long hair can support braids, ponytails, and larger gathered styles.
- Keep the wind in mind: Low braids, secured twists, and compact ponytails are often easier to manage outdoors than completely loose lengths.
- Avoid over-tightening: Tight elastics and twists can feel uncomfortable over time. Secure your style firmly but leave enough flexibility for natural movement.
- Take a small touch-up kit: A spare elastic, a couple of pins, and one extra clip can help if a section slips out.
- Protect natural curls: Avoid brushing curls dry, and refresh their shape with your fingers when needed.
- Check your hairstyle from different angles: A quick side and back photo can show whether a braid, twist, or clip is positioned where you want it.
You do not have to use every tip for every style. Choose the two or three that suit your hair and the weather, then keep the routine simple. The goal is to spend more time enjoying your pumpkin patch visit and less time worrying about your hairstyle. If you have natural texture, see our fall hairstyles for naturally curly hair.
Final Thoughts
The best Easy Pumpkin Patch Hairstyles are the ones that suit your hair length, work with your natural texture, and feel comfortable throughout the day. From mini clips for short hair and quick half-up twists for medium lengths to structured braids for long hair and curl-friendly gathered styles, there is an option for nearly every hair type.
You do not need a complicated routine to create a memorable autumn look. Choose one detail that makes the hairstyle feel special, prepare your hair for the weather, and use accessories that complement your outfit. With a practical style and a little preparation, you can enjoy cute, picture-ready hair throughout your pumpkin patch outing. For more ideas, try our pumpkin patch hairstyles with hats and easy everyday fall hairstyles, or browse the full fall hairstyles roundup.